Your Cart is Empty


Tanuki Bonsai
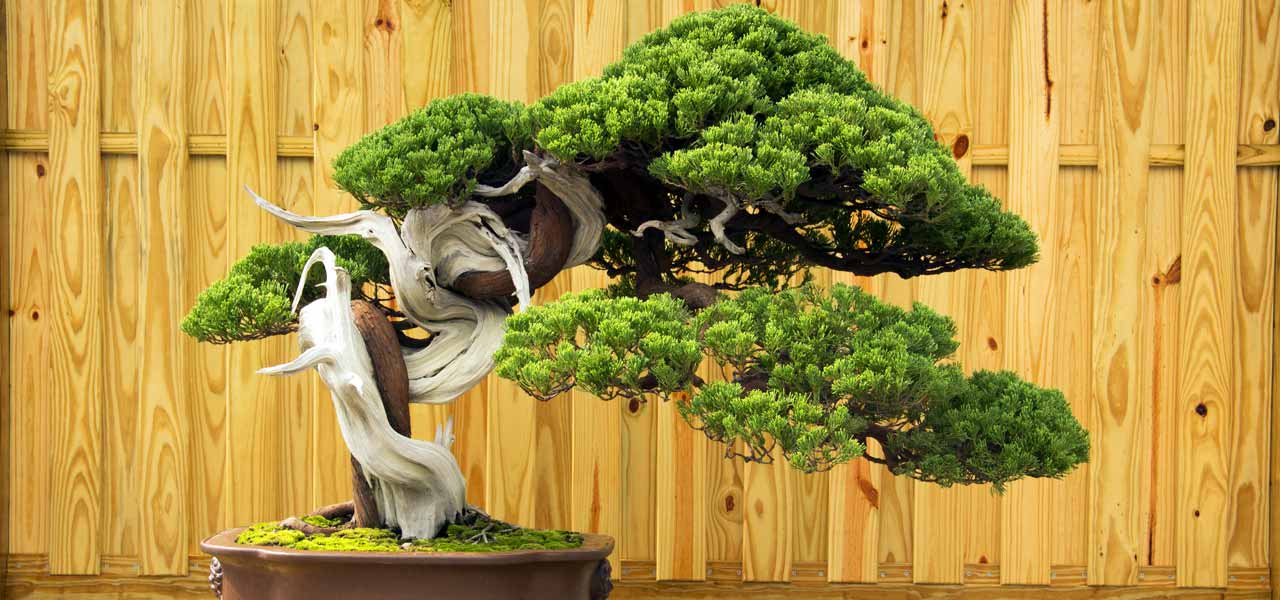
Please note, the image banner above is not a Tanuki. This is an award winning Taiwanese masterpiece. However it does provide inspiration for the reader.
For updates on these tanuki be sure to check the videos on my YouTube channel.
Introduction
If you are not familiar with the term, you will of course be wondering what it means so lets get that defined first and go from there. "Tanuki" is a Japanese word which directly translated means "raccoon." What has this to do with bonsai you must be wondering! Actually the explanation is rather humorous. The raccoon is an animal that has featured prominently in Japanese folklore and the arts throughout the centuries. This legendary animal is said to be mischievous and jolly. It is rumored it is a master of disguise and even capable of shape shifting.
This meaning gains significance when you understand the context of how or why the word is applied to bonsai. I searched many Japanese bonsai books I have in my library and none describe Tanuki as a style, in fact I could not find a single mention of it at all. I did however find it described as a substyle under deadwood techniques on Wikipedia. Here is an extract:
In tanuki bonsai, a living tree is joined to an interesting piece of deadwood to create a composite in the driftwood style. The deadwood usually has the form of a weathered tree trunk, or at least its lower portion.
You will find the full article on Wikipedia here.
Natural driftwood-style bonsai can only be collected from nature and are thus rather rare and or costly. In the case of Junipers, at least within the South African context, impossible to collect. Using the process or technique of Tanuki it is possible to create a very similar looking specimen although it is in effect cheating. For this reason it is said that Tanuki is not an acceptable bonsai technique, which explains why I could not find it in any of my reference books, and furthermore may not be exhibited in any formal Japanese exhibition. It is frowned upon in Japanese bonsai, certainly it would seem, amongst professionals.
Getting started - what you will need
It is my intent with this article, with the help of Brett Simon in video, to show you how you can create a Tanuki as I firmly believe there is a place for it, certainly in countries where it would be impossible to collect such a tree.
The deadwood
Depending on how long you have been practicing bonsai you may already have the material you need in order to create a Tanuki. This would include an interesting trunk from a tree which did not make it after collection, or perhaps even a piece of driftwood (although be careful of salts). If you don't have a trunk of a dead tree you most likely can speak with a local bonsai nursery or bonsai enthusiast you who may be able to oblidge.

This piece of deadwood is from a juniper I collected from an urban garden, which unfortunately did not make it. It possesses some interest and potential as part of a Tanuki planting.
I have heard of people using pieces of Mopane wood which you can find at pet stores as it is often used in fish tanks. If you buy this wood elsewhere be sure it has not been treated with chemicals which might kill your living tree, and if you are unsure I should imagine soaking it in some water for a few months, changing it occasionally, should leach this from the wood.
I'd encourage you to stay away from soft wood. Bear in mind that you want this creation to last for many years and in order to ensure the trunk does not rot naturally it will need to be treated. If the wood is soft this process is accelerated so try to use wood considered hard. This would include but not be limited to species such as juniper, olive, and even bladdernut. Soft woods include pine, maple, false olive (Buddleja) or in general any deciduous tree.
Living tree
You can create a Tanuki with any species of live tree provided it is flexible and vigorous enough to withstand the process. However I would suggest that the most suited species is the juniper. The reason I say this is as the resulting planting is characterized by a pronounced live vein on the otherwise dead wood. If you wish to have any resemblance to a natural tree then wild juniperus is species which immediately comes to mind as it develops this character in very old, mature trees. Very old olives also do develop live veins and with plenty (I presume) of collected olives around which never made it one can make good use of them and give them a chance to be reborn.
A lot can be written about your choice of live material and as I do not wish to make this article any longer than needs be I would rather suggest certain questions you might ask yourself when making your choice:
- Does it suit the style you want to create?
- Does it present the best genetics the species has to offer (leaf or foliage size and shape, internodal distance, colour etc)
- Can it physically be worked onto the deadwood? (Is it flexible or brittle)
- Will it live long enough for this planting to mature and develop interesting character or is a short lived plant such as a shrub?
Tools, fasteners and more
Carving. A groove is often carved in the deadwood, into which you will lay your living tree. You will need the necessary carving chisels or power tools and bits for this.

Nibbler carving bits can remove fairly large amounts of material rather quickly and will allow you to create further interest in your deadwood.
Securing. Decide whether you will use plastic cable ties, raffia, screws, wire or other means to secure your tree into the groove. The fastener should be easy to use, especially if you are working alone [as most of us do]. A branch jack will come in extremely handy as it will allow you to really get that live trunk right up against the deadwood. If your live tree is thin enough you can use a piece of rope and a metal rod to twist the rope, tightening the trunks together.

Make sure you purchase strong enough cable ties for the job at hand or they will simply snap when pulled taunt. A metal rod and strong rope helps compress the tree against the deadwood.
Sealer. You might need to make a number of cuts to remove branches which get in the way. You might even split the trunk of the live tree. In any case, sealing this exposed live tissue is best to promote healing and also prevent infection.

With the size cuts you are likely making the putty type sealer is preferable. Use the green lidded type for conifers and the white for deciduous.
Growing media. You will ideally want to disturb the root ball of the live plant as little as possible, as this will further weaken it. However you will most likely be potting the tree up into a new container to accommodate both the deadwood and live plant, so additional media will be needed. I would suggest a growing media which drains well and will encourage rapid growth in the live plant.
Container. Whether you use a plastic tub, purpose made wooden box or a ceramic pot, I would encourage you to use the smallest container you can possibly fit the final planting into. Overpotting may lead to overwatering (and rotting) and will at the very least be a waste of resources (read fertilizer and water). This might mean that you will need to secure not only the planting into the container, but also the complete planting to a surface to prevent it from being blown or knocked over.
Design
It goes without saying that you need to have a fairly clear idea of what you want to create. Unlike more commonplace bonsai design where you are working with a trunk with existing branches, Tanuki presents an opportunity for the artist to create almost from scratch.
I would strongly suggest a fair amount of time be given over to study of old, wild specimens of the species you intend reproducing. Pay particular attention to the deadwood character; flow, texture, thickness, tapering line and more. Consider carefully the live veins (which you will emulate with your live plant/s), where they originate from at ground level for greatest interest, the line they follow on the trunk and where they occur ie in depressions or protrusions.

I saved this image of a semi-cascade juniper created by well known Japanese bonsai artist Koji Hiramatsu. This, I believe, was the first styling of this tree but it was still quite inspirational to me.

Yes, yes I know. Don't make your bonsai look like a bonsai... however this is my attempt at achieving something similar. With a little imagination (OK, a lot) you can see how an otherwise useless piece of deadwood, combined with this common garden variety juniper has the potential to provide hours of fun and one day become something rather interesting.
The most important aspect of design at this stage of development will be the interaction or relationship of the live to the dead. The canopy will come later and will be formed from existing branches which of course might naturally develop from the live trunk or may be grafted. Grafting in fact elevates this technique to another level as you will also be able to determine the foliage type in the case of junipers.
Preparing the deadwood
You may want to carve some additional interest into the trunk and it is best to do as much of this before you attach the live plant as possible. The Nibbler bits combined with either a Dremel tool or a die grinder allows you to get really creative and safely remove wood rapidly.
Old junipers often possess these "blades" and by carving the already oblong shape of the trunk, thinning it and created some indentations, I was able to create some additional interest.
If the wood calls for it you may want to have it sandblasted to remove bark and other debris, soften tool marks or even add texture.

These are 3 pieces of deadwood I worked with root cutters and jin pliers to give some character to the sawn off ends to the branches.
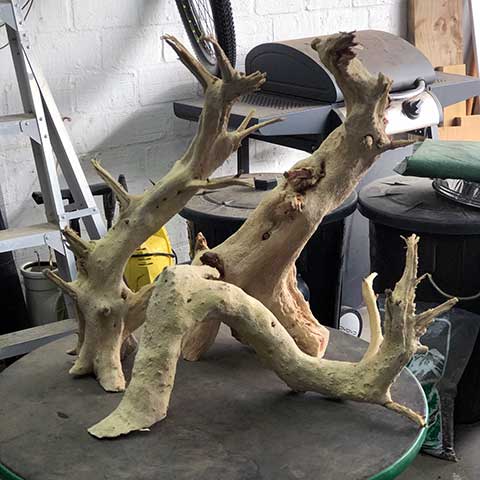
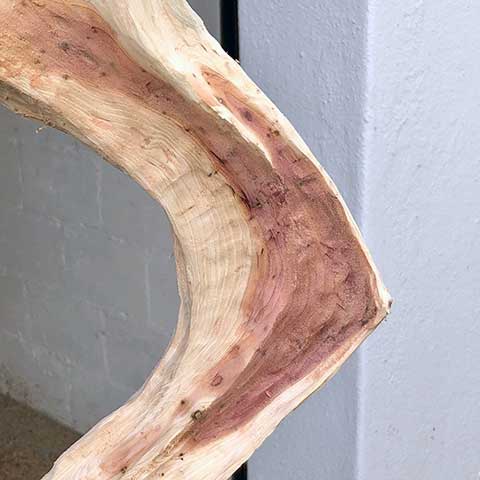
The same trunks post shot blasting (not sandblasting) which rapidly removed the bark, tool marks and also created a lot of texture from the process itself, but also as softer wood was removed leaving the harder grain behind and more exposed.

This is a close-up of the texture created by the shot blasting. Of course it is very unnatural at the moment, but I expect it to smooth out, crack and fissure over time. The trunks will not be treated until the desired surface finish is achieved however long it may take.
Applying a wood preservative might be appropriate now, it just depends on how weathered the wood is already and whether you want to halt that process. If not then don't apply the preservative yet, but rather allow the wood to weather and gain character over further exposure to the elements.
I am not experienced enough on what wood preservatives are currently available, however undiluted or slightly diluted lime Sulphur with or without ink (for a more natural colour) is the traditional solution for deadwood preservation although I know more modern products are available on the market.

Root cutters are robust tools which can be used to split wood, which can then be pulled with jin pliers to create a very natural looking jin. Do not use your branch cutters to do this please.
If you are going to carve a groove into the deadwood with the intention of allowing the live plant to gain girth and become firmly wedged in place, you need to bear in mind that you will need to create an undercut. If you don't, you might as well not create the groove as the tree will simply pop out. An alternative to creating a groove will be to firmly secure the tree against the deadwood with cable ties so it can grow into that shape. After a season or two you can then systematically remove the ties and fasten the trunk into place using appropriate screws. These screws are left in place and the tree will callous over them.
One step you should definitely not forego, or you may regret it later, is to flat cut the base of the trunk. This is an important step in order to ensure your planting can fit into a suitably size bonsai pot in the future. If you fail to perform this step you might find your choice of container is limited, or that the container you are compelled to use does not visually balance as it is too deep. Furthermore you may wish to drill and then insert a metal rod or rods onto which you can attach wires to secure your planting in the container.

To the flat base of the trunk, wood pieces have been secured (which can be replaced as and when needed) to elevate the deadwood as close to the surface of the planting as possible to reduce the onset of rot. An additional measure would be to use a medium like pumice, stone, LECA or basically anything which will not retain moisture immediately adjacent to the trunk.
Live wood preparation
Depending on the species you have chosen to work with, you may need to proceed differently to what I describe below.
Assuming your plant is in a nursery bag, you are most likely going to need to reduce the soil mass, which is also in part why you need to create Tanuki at the time when you would normally repot the species being used. However as the roots will be exposed while you assemble the Tanuki, take precautions to protect them from drying out. You can wrap them in plastic wrap for instance or simply mist them often.
If there are branches obviously in the way, it will be easier to cut them off now before you find your hands otherwise occupied.
If you have opted to lay the plant on the surface of the deadwood instead of inside a channel then I would encourage you to split the live tree in half. Although this may not work for all trees, it is quite safe to do this on a juniper provided you have sufficient foliage remaining to assist plant recovery. The advantage of splitting the plant is that you will start with a half round sort of shape which better resembles a live vein. If you leave the trunk in tact you will need to wait for it to form on the surface of the deadwood but I would suggest the tree will simply expand outwards and not begin to spread on the deadwood unless somehow forced to do so, so it is more likely to retain the appearance of being "attached" rather than "part of" for much longer.

You can split the trunk of your live plant, discarding the unused side (as you will retain all the roots on the side you keep). The flat side will be pressed up against the deadwood and will achieve the appearance of a live vein faster.
Assembly
After preparing your deadwood, live plant, all the fasteners and whatever else you think you are going to need then you are ready to start.
Position your tree in the desired spot on the deadwood taking care with the level of the roots; not too deep so a gap remains between the roots and the base of the deadwood, but also not too high up the deadwood leaving a significant portion of the deadwood buried as this will accelerate rotting. Fasten your live tree in place using your chosen method ie screw, cable tie or other.

You may find that there is a gap between the live and deadwood. You need to make your best attempt to close this gap. The best way is with a branch jack. If you don't have one you can use some rope and a metal bar; twisting the bar will tighten the rope. Use padding to protect the bark of the live tree if you need to.

I wrapped raffia on the one planting after securing the tree to the deadwood. The idea behind this is similar to the reason it is used when bending; it helps to retain moisture which facilitates healing of the micro breaks in the trunk. Not sure if it will make too much of a difference but hey, every effort is worth it to ensure the tree's survival.
Continue along the length of the deadwood, securing the live tree well as you go. When you reach the apex you can place your final fastener. Do not cut the tip of the live tree as you will want to encourage it to grow for at least a full growing season. This uncontrolled growth will help to conform the tree to the contours of the deadwood, initiate callousing of any cuts you might have made and generally ensure the health of the tree and the future of the Tanuki planting.

Note the height of the old soil line/root level and how close it is to the base of the deadwood. You can use multiple live trees depending on your design, although it does become rather challenging when doing this on your own!
Aftercare
The aftercare of your Tanuki is very important if you want it to flourish in the season ahead. Essentially you will want to treat it like any recently repotted tree. This means you need to shelter it from wind as much as possible. Shading it for at least the first month or even more (up to 6 months where more drastic work was done) is a good idea, exposing the planting to morning sun but shading it from hot afternoon sun.

The creative possibilities with Tanuki are extensive. Make use of these opportunities and get really creative.
You can foliar feed your planting after a few weeks when you see positive signs of recovery such as new growth. Roots need time to settle and begin developing so solid fertilizers should be withheld for at least a month. However fertilizing with solid fertilizers earlier will do no harm, it will just not fully be utilized by the plant yet.
Keep an eye on watering like you would any other recently repotted tree, there will be less moisture loss than normal and you don't want cause roots to rot by exposing them to constant moisture.
Bonus Content!
Go out and make a Tanuki. Have fun and if you do it just right you will have everyone fooled, you raccoon you!
Leave a comment
Comments will be approved before showing up.
