Baking Tools Guide
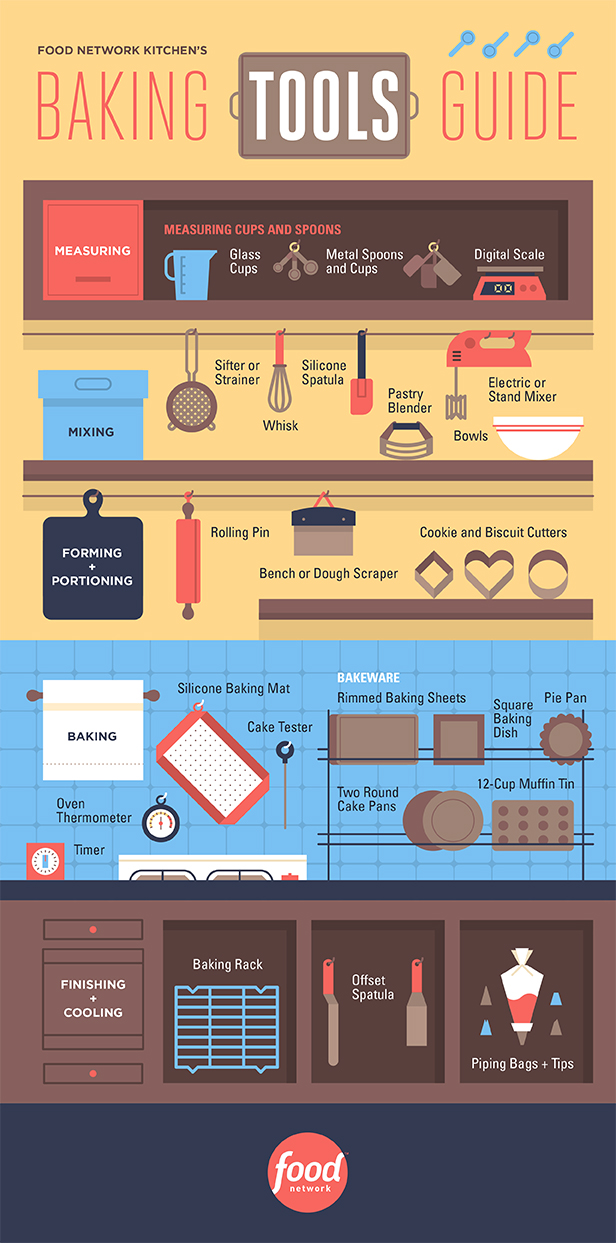
When it comes to baking, one's tools can lead to either satisfying success or frustrating failure. There are tons of products available to help with tackling different baking tasks — from mixing and measuring up through finishing and decorating. Here are some of the more common tools you'll encounter along with way, with guidance, tips and uses for each.
MEASURING
Measuring Cups and Spoons: Proportions are key for any baking recipe, so measuring cups and spoons are invaluable for amateur and professional bakers alike. Glass cups are great for reading liquid amounts, and metal spoons and cups are ideal for scooping and leveling dry ingredients.
Digital Scale: When it comes to dry ingredients, a digital scale is the most-accurate way to measure. The amount of flour in one cup can actually vary by up to 30 percent depending on whether or not it's been sifted, how you actually got the flour into the measuring cup and how humid the air is that day. Precise measuring can make the difference between airy treats and heavy bricks.
MIXING
Sifter or Strainer: Nothing is worse than biting into a slice of cake and getting a clump of flour or baking soda — sifting can easily prevent that scenario. A sifter is a relatively inexpensive and rather vital piece of equipment, useful with just about any recipe. You can also use a fine-mesh strainer to let your kitchen tools pull double duty.
Bowls: It's best to use bowls made of glass or a nonreactive metal (e.g., stainless steel). Plastic bowls can retain flavors that you might not want in your muffins, and they are also no good for melting chocolate or whisking egg yolks and sugar over a pot of simmering water.
Pastry Blender: Sometimes referred to as a "pastry cutter," this tool helps you cut fat into dry ingredients to create flaky biscuits, scones and pie crusts. If you don't want to do the manual labor, the same result can also be achieved with a food processor.
Silicone Spatula: If you do any type of baking at home, then you probably already have one of these. They’re heat-resistant, don't stain or absorb flavors, and are essential for gently mixing things such as cake batters, meringues or whipped cream. (They're also excellent for making omelets and scrambled eggs.)
Whisk: A whisk is the best tool for thoroughly combining just about everything. Use an all-purpose whisk to mix up brownie or muffin batter, or test your arm strength with an extra-wide balloon whisk when making meringue or whipped cream.
Electric or Stand Mixer: An electric mixer is sure to make your baking life much easier, especially when it comes to creaming butter or whipping cream. While they’re expensive, stand mixers can be a great investment for your kitchen arsenal, making everything from kneading dough to whipping egg whites a breeze.
FORMING & PORTIONING
Rolling Pin: This essential tool is used with just about any type of baked good you can imagine — biscuits, scones, pie dough, puff pastry, cutout cookies and even fondant for cake decorating. Needless to say, this is a must-have for any home baker. It can be made out of wood, marble, metal or silicone, with or without handles, and straight or tapered. These specifications are mostly a matter of preference, but a wooden dowel makes for a great all-around rolling pin. And remember, never soak wooden rolling pins in water; instead, wipe with a damp cloth to clean.
Bench or Dough Scraper: As the name implies, a bench scraper is useful for getting any stuck-on messes off your counter, but can also be used for portioning dough. They can be made of either metal or plastic, with plastic being great for getting the last bits of batter or dough out of a bowl.
Mechanical Scoops: These are great for more than just ice cream. Mechanical scoops come in a range of sizes and can be used for getting uniform cookies and perfectly portioning cupcake batter. The key is finding one that's comfortable for you to use, which can mean choosing between one that requires a full-hand squeeze and one that needs just the press of your thumb.
Cookie and Biscuit Cutters: These come in all shapes and sizes — from the basic (squares or stars) to the more elaborate (cars or dinosaurs). If so inclined, you can even start a collection with different shapes to be passed on to future generations along with family recipes. But if you don't want the extra equipment, you can always just use a cup to make circles.
COOKING
Silicone Baking Mat: Made out of fiberglass and silicone, these nonstick mats are a great alternative to parchment paper, since they are reusable. A silicone baking mat is pretty much a necessity for baking tuile cookies — it's great for all your other cookies too — and is also useful when placed under fruit pies to catch any spills during baking.
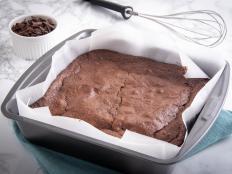
Bakeware: Some introductory bakeware pieces you'll most likely want to have are rimmed baking sheets, a square baking dish, a pie pan, two round cake pans and a 12-cup muffin tin. Most bakeware can be made of ceramic, glass, metal or silicone. Ceramic tends to be more decorative; glass lets you see how brown your food is getting; metal is the best conductor of heat; and silicone takes away all of your worries about sticking. If you choose metal, look for heavy pans without a dark coating, as this can brown baked goods too quickly; a nonstick finish usually isn't that necessary either, especially when the pan is greased and floured properly or a silicone mat is used.
FINISHING, COOLING & DECORATING
Timer: Though your sense of smell can be a good indication of readiness, relying on just your nose can sometimes lead to disaster. Always set a timer to save yourself from accidentally falling asleep and waking up to a smoke-filled kitchen. Baking times can vary depending on the precision with which you followed the recipe, the temperature of ingredients at the start or the weather that day. It's a good idea to check items halfway through and rotate the bakeware for more even cooking. Set the timer for a few minutes before what the recipe calls for, just in case the food is ready early.
Cake Tester: Though a toothpick often does the job just fine, a metal cake tester has a few advantages when it comes to doneness. First, it is reusable and cuts down on waste, and second, its length makes it easier to use with thick baked goods. Outside of baking, many professional cooks also use them for testing whether meat and fish are warmed through.
Baking Rack: Generations past would place their freshly baked goods on windowsills both to cool and to tempt passersby. Today, a baking rack is the preferred method. Let items such as cookies, muffins and cakes cool for a few minutes in the pan before transferring to a rack to cool completely. The rack provides better air circulation to help speed up the chilling process and inhibit overcooking.
Offset Spatula: These are made of flexible stainless steel, come in a range of sizes and are usually rounded at the end. Offset spatulas are great for frosting cakes or spreading batter in a jelly roll pan. A medium-length spatula with a comfortable grip is a good all-around choice.
Piping Bags and Tips: Piping or pastry bags allow for greater control and more elaborate designs when decorating. Tips are available in an assortment of shapes and sizes for lines, stars, roses and even basketweaving — you can let your imagination run wild! Pastry bags can be disposable or made of plastic-coated fabric; with the latter it is important to wash and dry thoroughly between uses. Piping bags are also used for shaping eclair and cream puff dough.
LASTLY, THE MOST-IMPORTANT BAKING TOOL OF ALL IS …
… your oven! Perhaps the most-critical factor many home bakers ignore is making sure you're actually baking things at the temperature you think you are. An oven thermometer is a great gadget to prevent mishaps caused by baking things at too low or high a temperature. Another important aspect to remember is that rack position matters. The heat source can be at either the top or the bottom of your oven, which can lead to hot and cold spots, so it's best to always bake on a rack placed in the middle. And if you're so lucky as to have a convection oven, this setting will help solve the problem of uneven cooking. But with convection cooking, be sure to either reduce the temperature by about 25 degrees F or shorten the baking time by roughly a quarter for most recipes.
