How to Draw a Lion Full Body Step by Step
This step by step tutorial shows how to draw the full body of a lion from the side view with illustrated drawing examples for each step.

Please note that the drawing also shows a “no mane” version of the lion which can be applied to drawing a lioness or a younger lion.
If you are going to be following the tutorial using pencil and paper be sure to draw light lines that you can easily erase for at least the first five steps of the tutorial.
Step 1 – Draw the Simplified Shapes of the Lions Head & Body
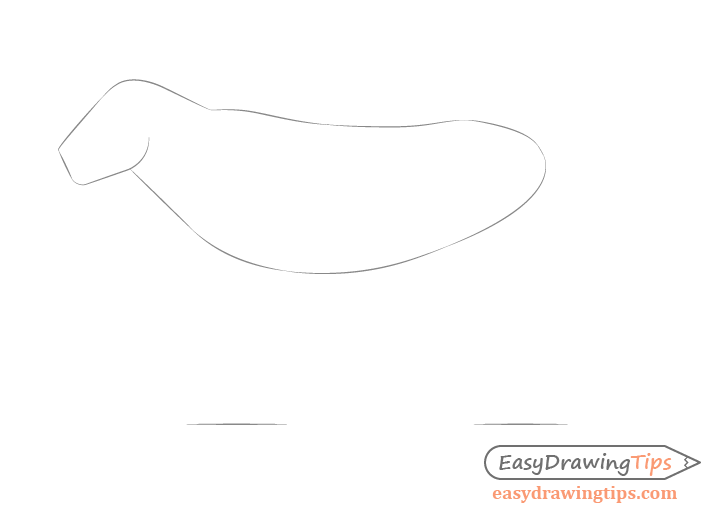
Start the drawing of the lion by first outlining the basic shape of it’s body and head. At this stage leave out any of the smaller details. The goal of this and the following two steps is to construct a rough overall shape of the lion and to compare the proportions of its major body parts to one another.
In this step the main shape of the body should very loosely resemble a bean and the snout can slightly resemble a bucket. Add a curve from the snout/neck area that will define the cheek and another curve to define the top of the head.
At this point you can simply join the head/neck with just two lines to establish the neck.
You can also draw a pair of horizontal lines to help estimate the length of the legs.
Step 2 – Draw the Legs
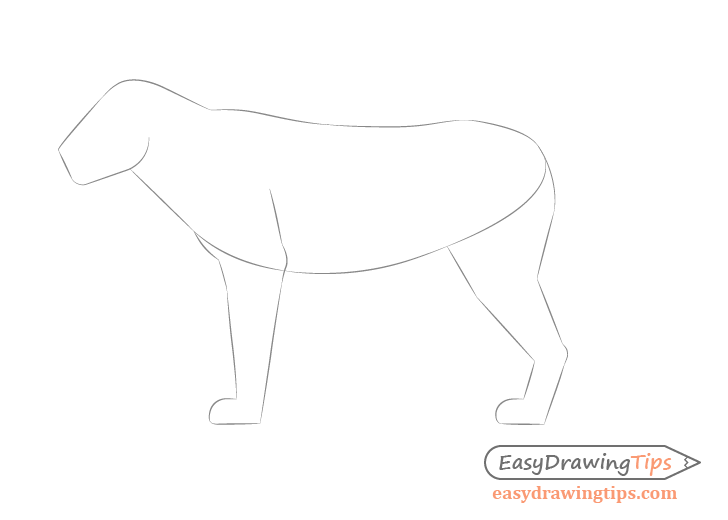
Now draw the simplified shapes of the front and back leg as shown in the above example. You can do this by using mainly straight lines with a few basic curves around the joints and two larger curves to indicate the upper front areas of the paws.
Step 3 – Draw the Tail & Ears

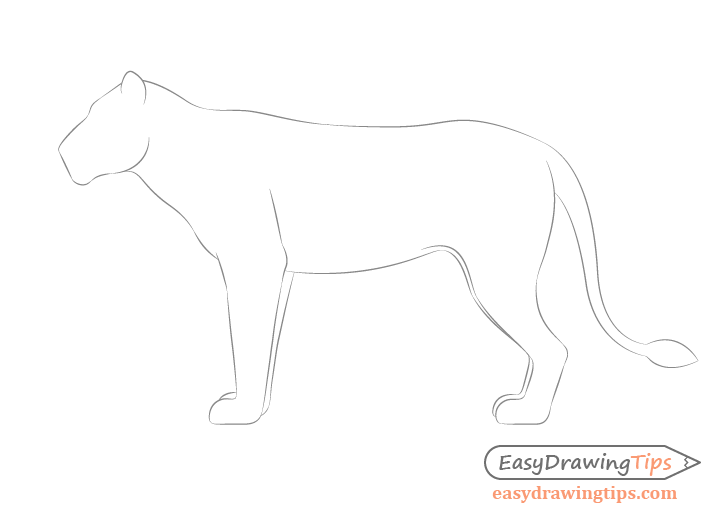
Draw the ears going through the middle of the top curve of the head angled slightly towards the snout. Add the tail in a wave like shape thicker towards the base and thinner towards the tip. Lions also have a brush like clump of hair at the end of their tails and for this stage you can simply outline the general shape of that brush with tho curved lines.
Once done you should have the finished basic construction line drawing of the lions body.
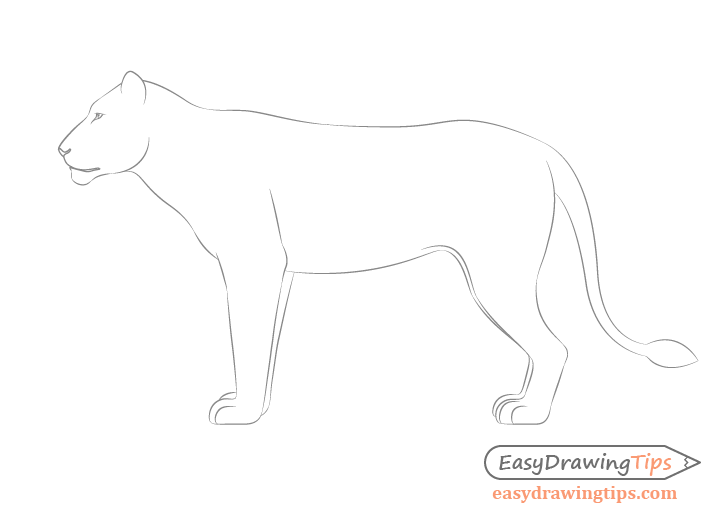
Step 4 – Draw the Organic Outline Shape of the Lion
Now refine the construction line drawing into the more organic shape (excluding the nose/mouth and tail end areas) of the lion by adding the smaller bends and curves along its body.
Afterwards draw in the second front and back leg on the “far side” of the lion. Draw these slightly smaller than the legs on the set of legs facing towards the viewer to show some perspective.
For a detailed explanation of perspective drawing see:
Perspective Drawing Tutorial for Beginners
Step 5 – Draw the Facial Features & Toes
Add the facial features (see close up drawing below) and toes.
In this view you will generally only be able to see two or three of the lions toes on each foot. You can outline each toe with just one curved line.
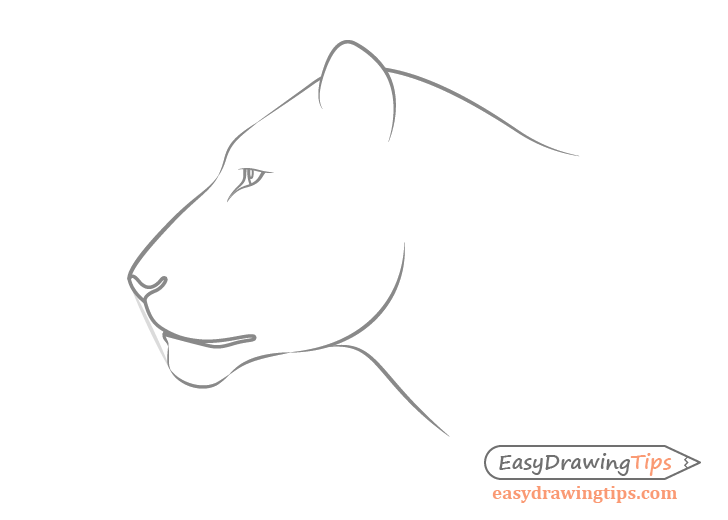
Draw the lions eye with the top part of the iris/and pupil covered by the top eyelid (or the lion will look like he has a crazy stare). Add a pair of lines that defines the shape of the inner end of the eye that run slightly down the snout and join some distance away from the eye.
Add the nose with a wider front that then transforms into a nor marrow curve.
Make the front mouth/lip area slightly indented into the head and draw the shape of the mouth itself first in a downwards and then in an upwards slope.
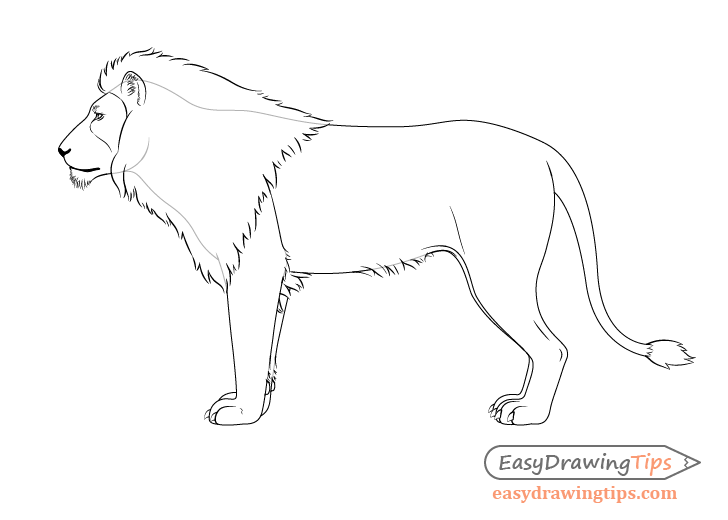
Step 6 – Finish the “No Mane” Line Drawing

For this step you can draw the smaller details of the lions body such as some hints of fur along the head/face (described below) as well as the individual fur clumps on the end of the tail.
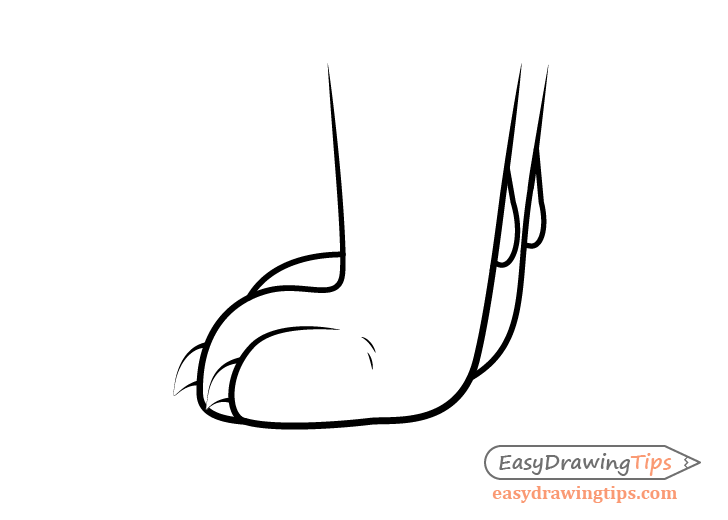
Draw the claws growing from roughly the middle of each toe and curving downwards. Obviously you will want to draw each claw thicker towards the base and thinner towards the end.
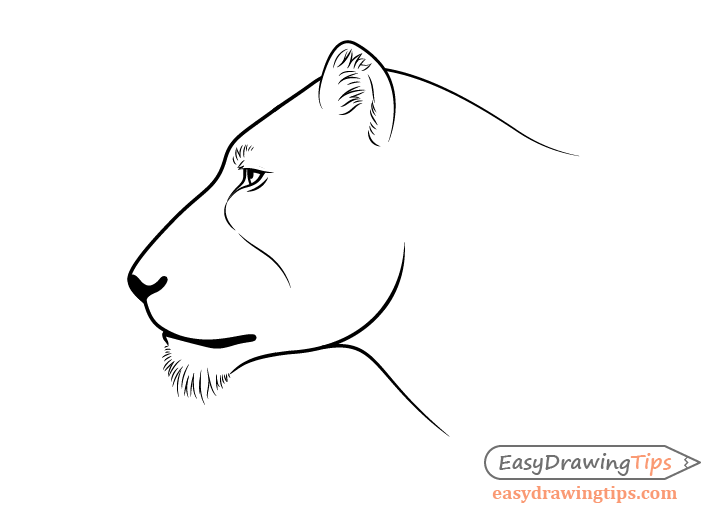
You can see the details of the face in the close up example above.
Draw some hints of fur on the inside of the ears, along the top of the eyes and the bottom of the chin.
After you are done with the face draw the claws and give some hints of the bone and muscles along the back leg.
Finally also draw the claws and the small toes along the back of the front legs. You should have a pretty much finished line drawing of the lion once you are done. At this point if you want it to be a lioness or a younger lion you can simply go over your drawing with darker lines and move to the last step to add the whiskers.
If you want to draw the mane (and some more details of the fur) then hold off on darkening the lines and move on to the next step
Step 7 – Draw the Mane & Additional Fur Clumps
The shape of a lion’s mane is fairly random. Generally the hair around the top of the head tends to tick out facing slightly more forward and then transition into curving backwards along the shape of the neck. The hair at the bottom of the mane will either hang down or point slightly backwards.
The entire mane will basically consist of small fur clumps of various sizes. Try and draw the clumps with slightly different curves and twists but at the same time try and respect the general direction of the hair as described above.
Once you are done with the mane you can add some hair along the belly area. Afterwards you can also add small clumps of fur along the “elbow” area towards the top of the front leg as well as around the top of the backwards facing toes.
Step 8 – Clean Up the Drawing
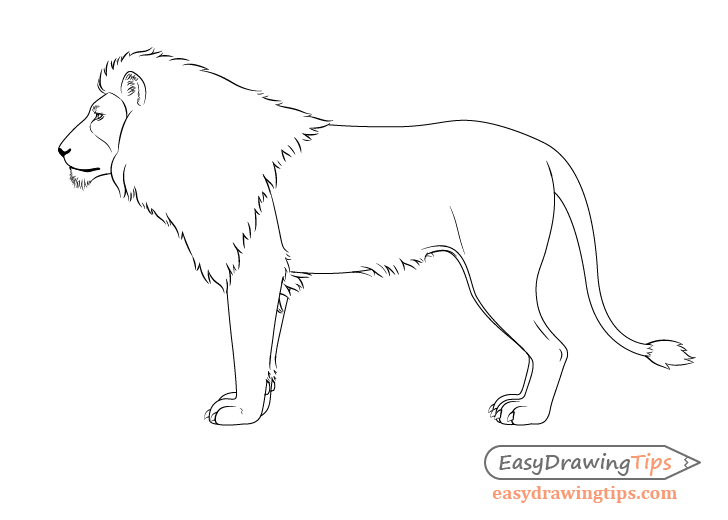
For this simple step erase any parts of the body covered by the fur and go over your drawing with darker lines.
Step 9 – Add the Whiskers and Finish the Lion Drawing

For this final step you can add the whiskers to finish the drawing of the lion.
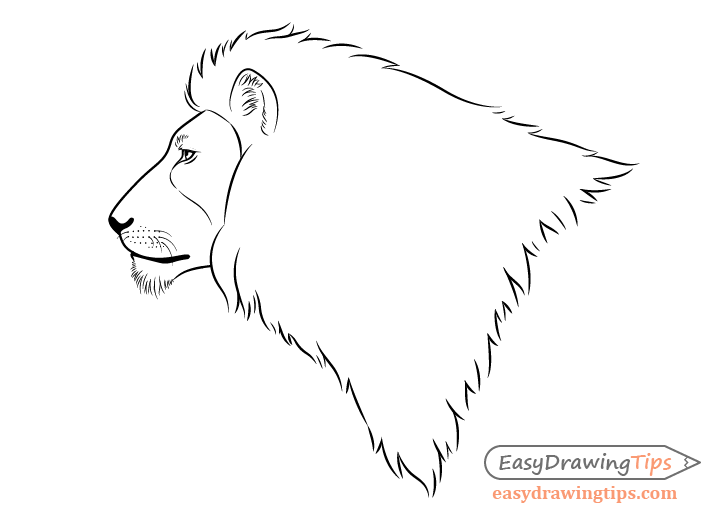
You can see a close up drawing of the lions head above.
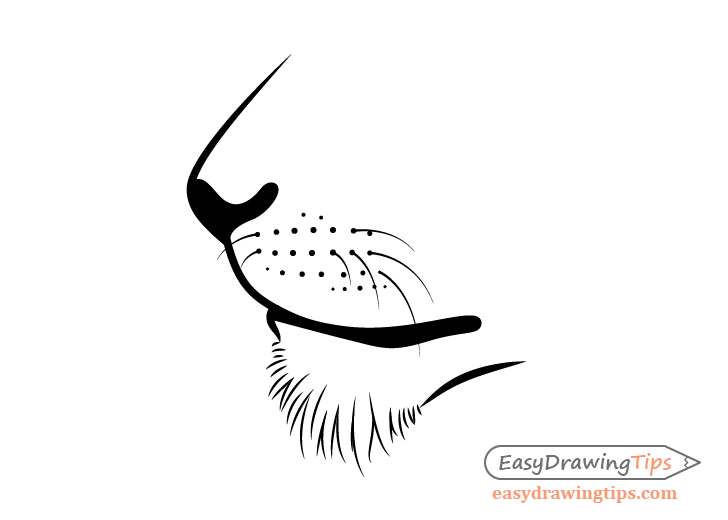
The whiskers tend to grow from a set of dots in the upper part of the lions mouth area. Lions usually have several horizontal rows of these dots along their face with the outer dots being smaller and the middle dots larger.
Depending on the side of your drawing you can try and make the whiskers thicker towards their base and thinner towards the tips. This may be harder to do in a smaller drawing so if you find that to be the case just draw the whiskers with the same thickness throughout.
Also try and give the whiskers slightly different curves and vary their length to make them look more natural.
Conclusion
A lion can be a fairly challenging animal to draw especially so if you want to draw the entire body. Hopefully this tutorial has helped you get a better idea of how to draw one.
For drawing a lions face in the front view see:
How to Draw Lion Face & Head Step by Step
For other similar tutorial see:
- How to Draw a Horse From the Side View Tutorial
- How to Draw a Rabbit Step by Step Tutorial
- How to Draw a Squirrel From the Side View Tutorial
- How to Draw a Frog Step by Step Tutorial
- How to Draw an Eagle Head Step by Step