Linux is a versatile operating system with a vibrant community, and there are plenty of fun and quirky things you can do with it. Linux provides a lot of room for creativity and customization. In this comprehensive blog post, we'll introduce you to a collection of entertaining and fun Linux command line tools that bring creativity and joy to your terminal sessions. Whether you're a Linux pro or a curious newbie, these tools will add humor, artwork, and surprises to your command line experience.
Many utilities listed here are useless. They might not be as beneficial for average users and newcomers. Most of these tools are developed purely for fun and as a means to learn to code.
However, some of the tools are somewhat useful for power users, developers, and sysadmins.
Table of Contents
1. Cowsay
Cowsay is a program that generates ASCII art representations of messages with an animated cow speaking the message.
First, make sure you have cowsay installed. You can typically install it using your Linux distribution's package manager. For example, on Ubuntu or Debian-based systems, you can run:
$ sudo apt install cowsay
Once cowsay is installed, you can use it to display a message with an animated cow.
Here's a simple example:
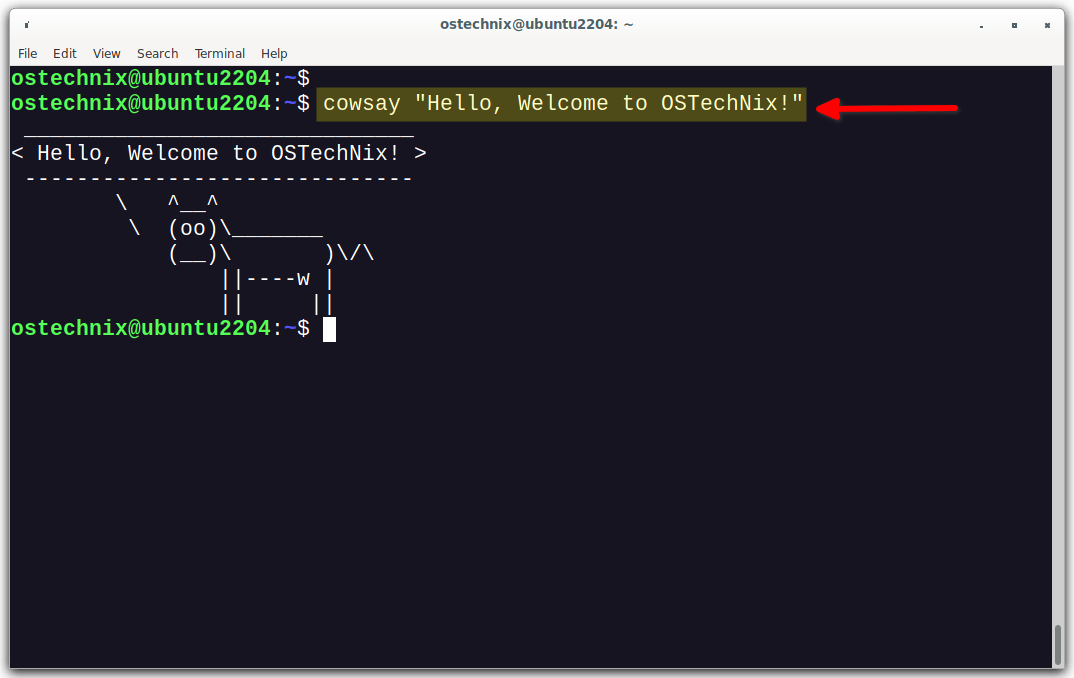
cowsay "Hello, Welcome to OSTechNix!"
This command will display the following output:
______________________________
< Hello, Welcome to OSTechNix! >
 ------------------------------
        \   ^__^
         \  (oo)\_______
            (__)\       )\/\
                ||----w |
|| ||You can customize the cow and speech bubble by using different options. For example, you can change the cow's appearance:
$ cowsay -f tux "I love Linux!"
This will display Tux the penguin saying "I love Linux!" instead of the traditional cow.
_______________
< I love Linux! >
 ---------------
   \
    \
        .--.
       |o_o |
       |:_/ |
      //   \ \
     (|     | )
    /'\_   _/`\
    \___)=(___/
You can also use the -e option to specify the eyes and the -T option to specify the tongue:
$ cowsay -e ^^ -T UU "I use Arch Linux BTW!"
This will make the cow say "I use Arch Linux BTW!" with different eyes and a different tongue.
cowsay is a fun and whimsical tool that can be used to add a touch of humor and creativity to your Linux terminal. You can experiment with different cow files and options to create various amusing messages.
2. Fortune
Fortune is a program that displays random quotes, jokes, or aphorisms from a database of text files.
Make sure fortune package is installed on your system:
$ sudo apt install fortune
Here are some usage examples for fortune command usage:
Display a Random Fortune:
To display a random fortune, simply run the fortune command with no arguments:
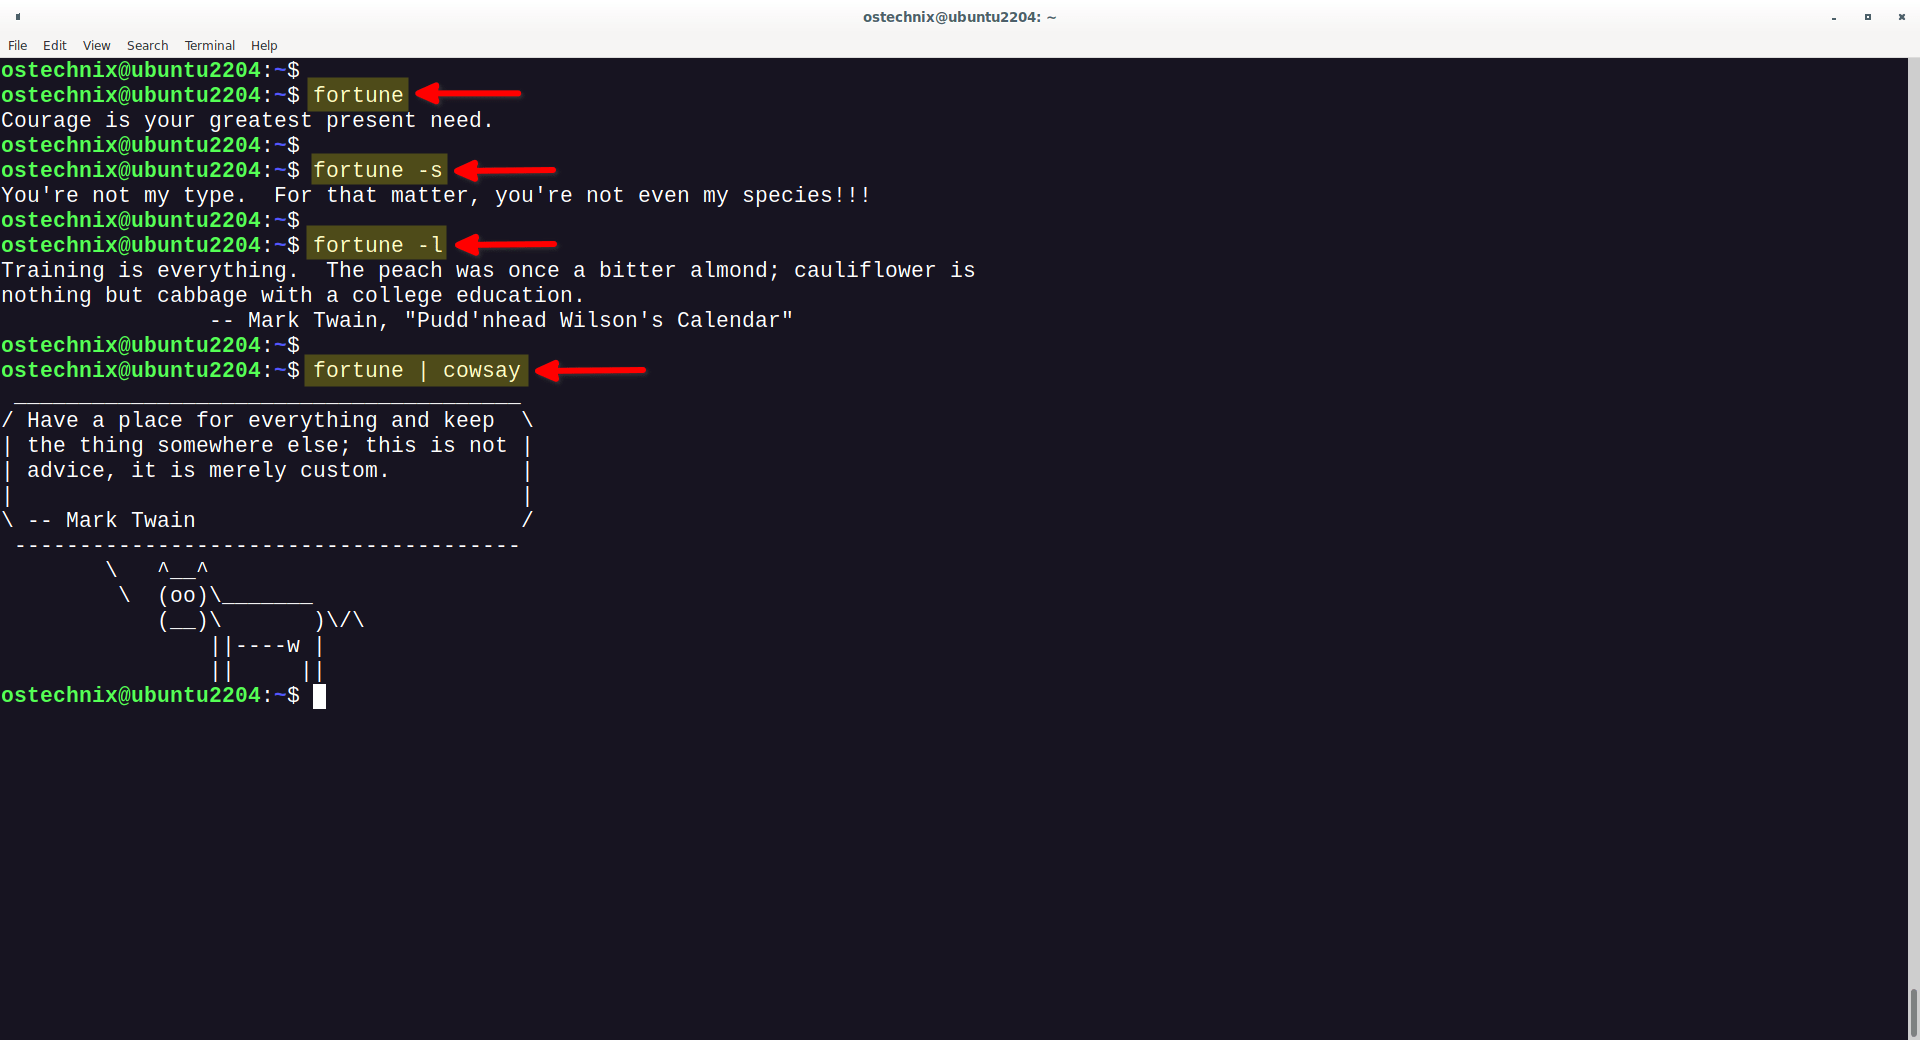
$ fortune
This will show you a random fortune message from the database.
Display a Short Fortune:
You can use the -s option to display a shorter fortune:
$ fortune -s
Short fortunes are usually concise and to the point.
Display a Long Fortune:
To display a longer fortune, you can use the -l option:
$ fortune -l
Long fortunes tend to be more elaborate and detailed.
Combine Fortune with Cowsay:
For extra fun, you can combine fortune with cowsay to have the cow deliver your fortune:
$ fortune | cowsay
Display Offensive Fortunes (Risky):
Be cautious with this one! You can use the -o option to display potentially offensive fortunes:
$ fortune -o
Some fortunes in the database may contain humor that some users might find offensive, so use this option with care.
Display a Fortune from a Specific File:
You can specify a fortune file using the -f option. For example, if you have a custom fortune file named my_fortunes:
$ fortune -f my_fortunes
This will display a random fortune from your custom file.
Display a Fortune on Login:
To have a random fortune displayed each time you log in, you can add the fortune command to your shell's login script (e.g., .bashrc, .zshrc).
Redirect Fortune to a File:
You can also redirect a fortune to a file for future reference or to share with others. For example:
$ fortune > my_fortune.txt
These are just some of the ways you can use the fortune tool. It's a fun and lighthearted utility that can provide you with amusing and sometimes thought-provoking messages each time you run it.
3. Figlet
Figlet is a tool that creates stylized text banners using ASCII art fonts. It's commonly used to generate large, decorative text.
Install figlet package if it is not installed already:
$ sudo apt install figlet
The figlet command is used to create stylized text banners using ASCII art fonts. Here are some example usages:
Basic Usage:
To create a simple ASCII art banner with default font, use figlet followed by your desired text:
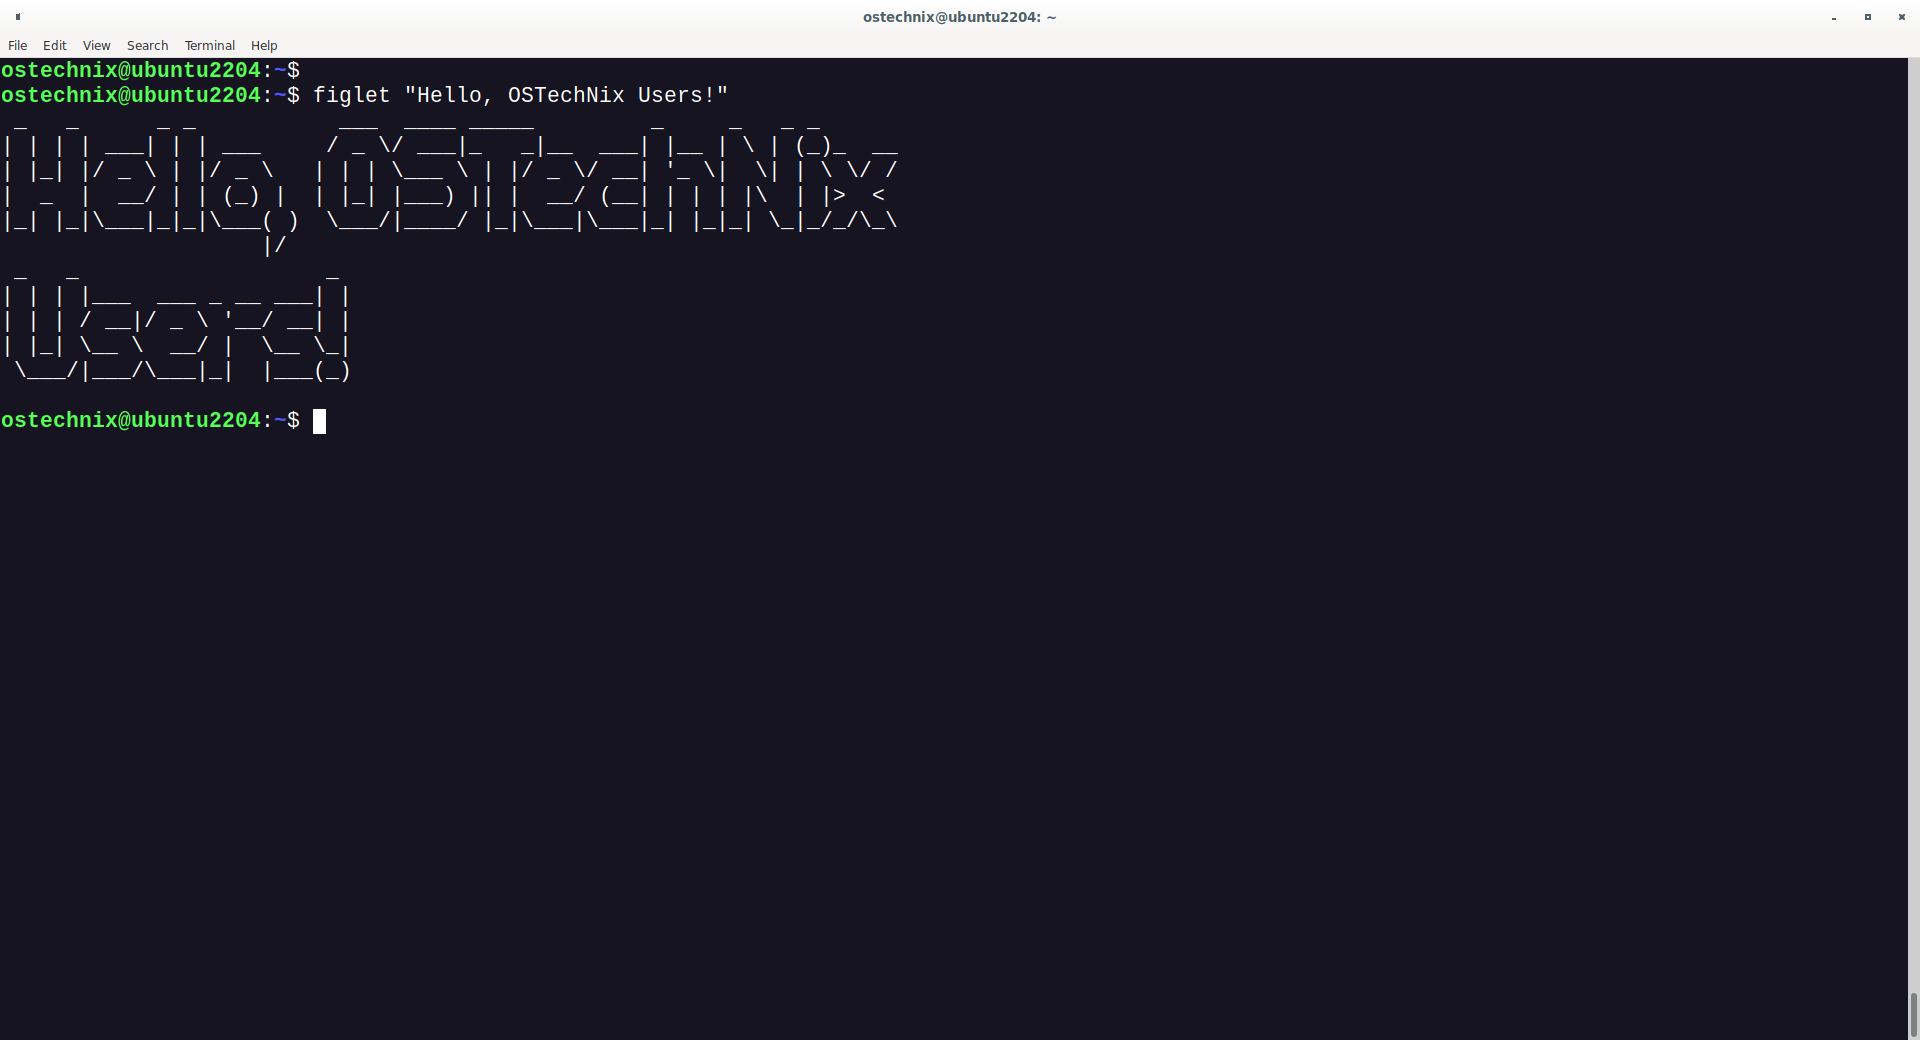
$ figlet "Hello, OSTechNix Users!"
This will generate an ASCII art representation of the text "Hello, OSTechNix Users!" using the default font.
Specify a Font:
You can specify a particular font by using the -f option. For example, to use the "block" font:
$ figlet -f block "OSTechNix"
List Available Fonts:
To see a list of available fonts, you can use the -l option:
$ figlet -l
This will display a list of font names that you can use with the -f option.
Change the Output Width:
You can change the width of the output banner using the -w option. For example, to limit the output to 40 characters wide:
$ figlet -w 40 "Wide Text"
Save Output to a File:
To save the ASCII art banner to a text file, you can use output redirection (>):
$ figlet "Banner Text" > banner.txt
This will save the banner to a file named banner.txt.
Pipe Output to Cowsay:
For added fun, you can pipe the output of figlet to cowsay to have a cow say your ASCII art message:
$ figlet "Hello, Linux!" | cowsay
Display Random Banner with Fortune:
You can use fortune to display a random fortune along with a figlet banner:
$ figlet "$(fortune)"
To display the text in different font, for example script, run:
$ figlet "$(fortune)" -f script
These examples demonstrate some of the ways you can use figlet to create decorative text banners in your terminal. Experiment with different fonts and options to create visually appealing text art for various purposes.
4. Sl
Sl (Steam Locomotive) is a playful command-line utility that displays an ASCII art steam train animation when you accidentally mistype "ls" (the command to list directory contents).
If you don't already have sl installed, you can install it using your package manager. For example, on Debian-based systems like Ubuntu, you can run:
$ sudo apt install sl
Run sl:
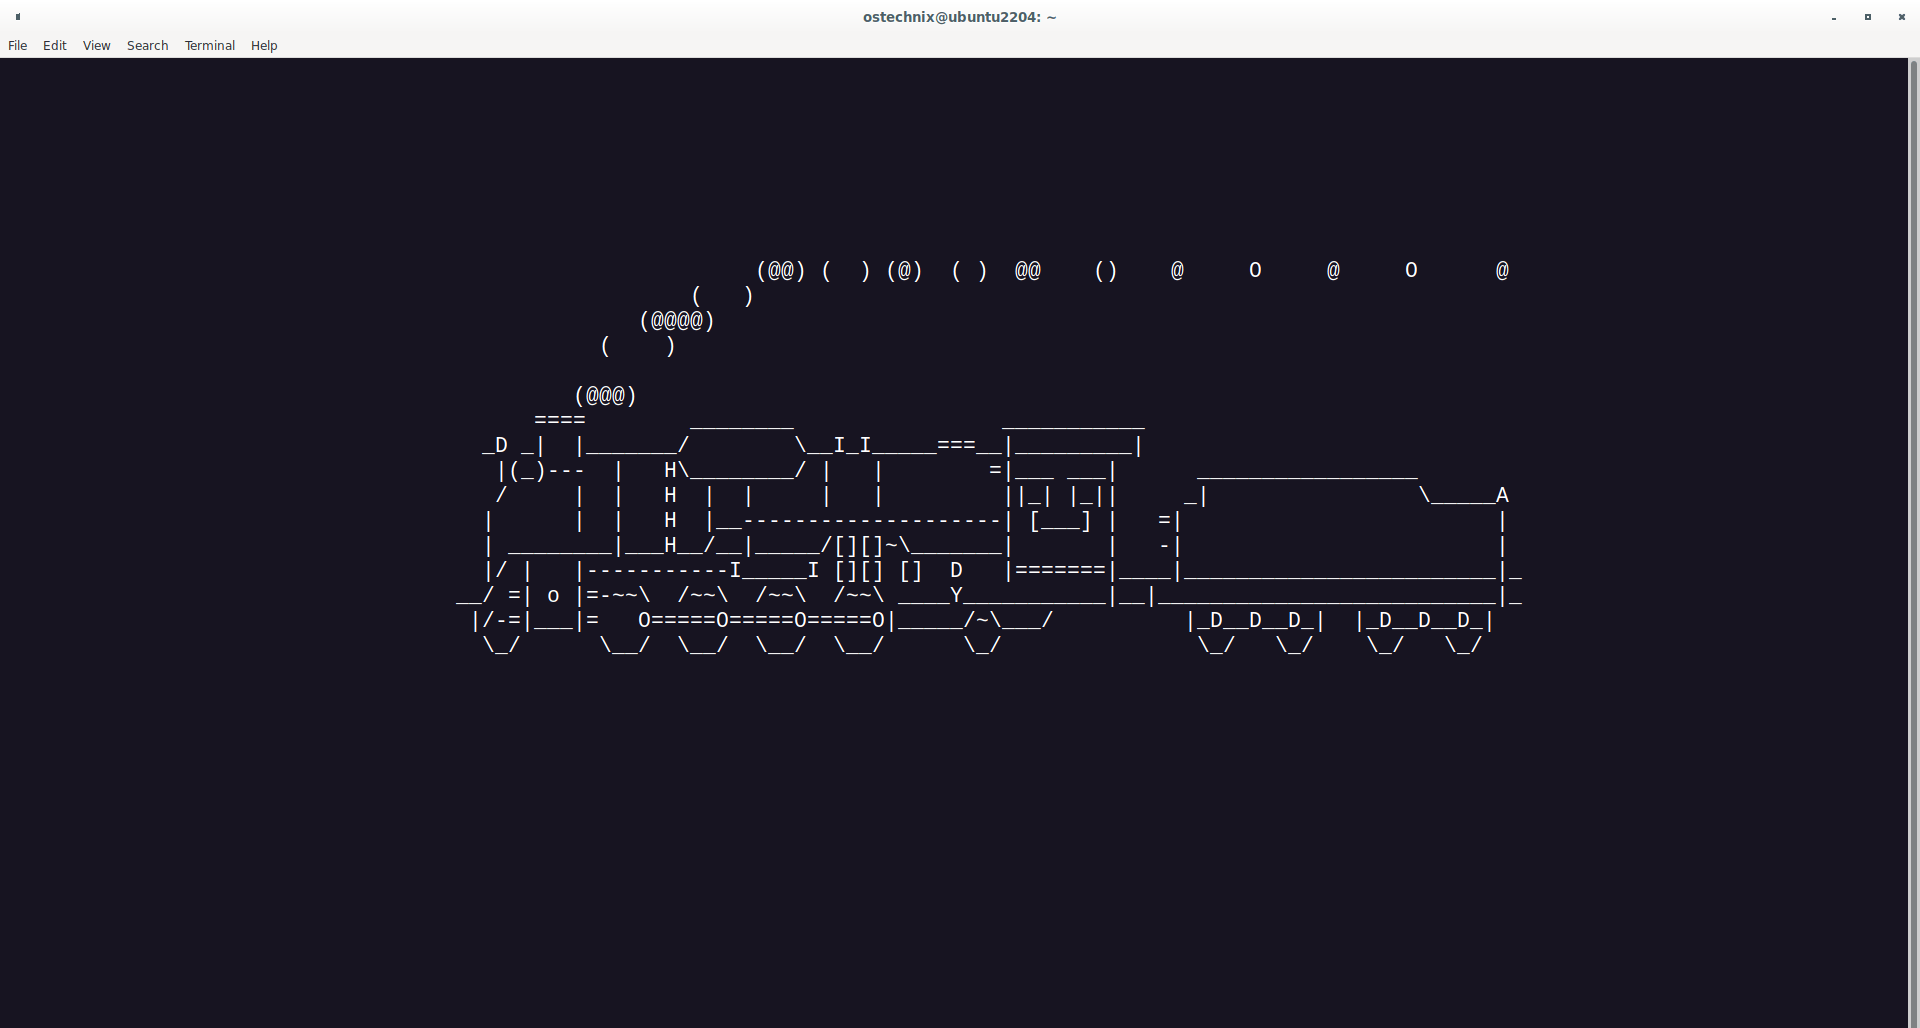
Simply type sl in your terminal and hit Enter:
$ sl
Enjoy the Animation:
After running the command, you'll be treated to a whimsical ASCII art animation of a steam locomotive chugging across your terminal screen. It looks like the locomotive is going off the rails, creating a fun visual effect.
The sl command is a humorous way to remind you that you've mistyped "ls," and it's a lighthearted addition to the Linux terminal that can bring a smile to your face when you least expect it.
5. ASCIIquarium
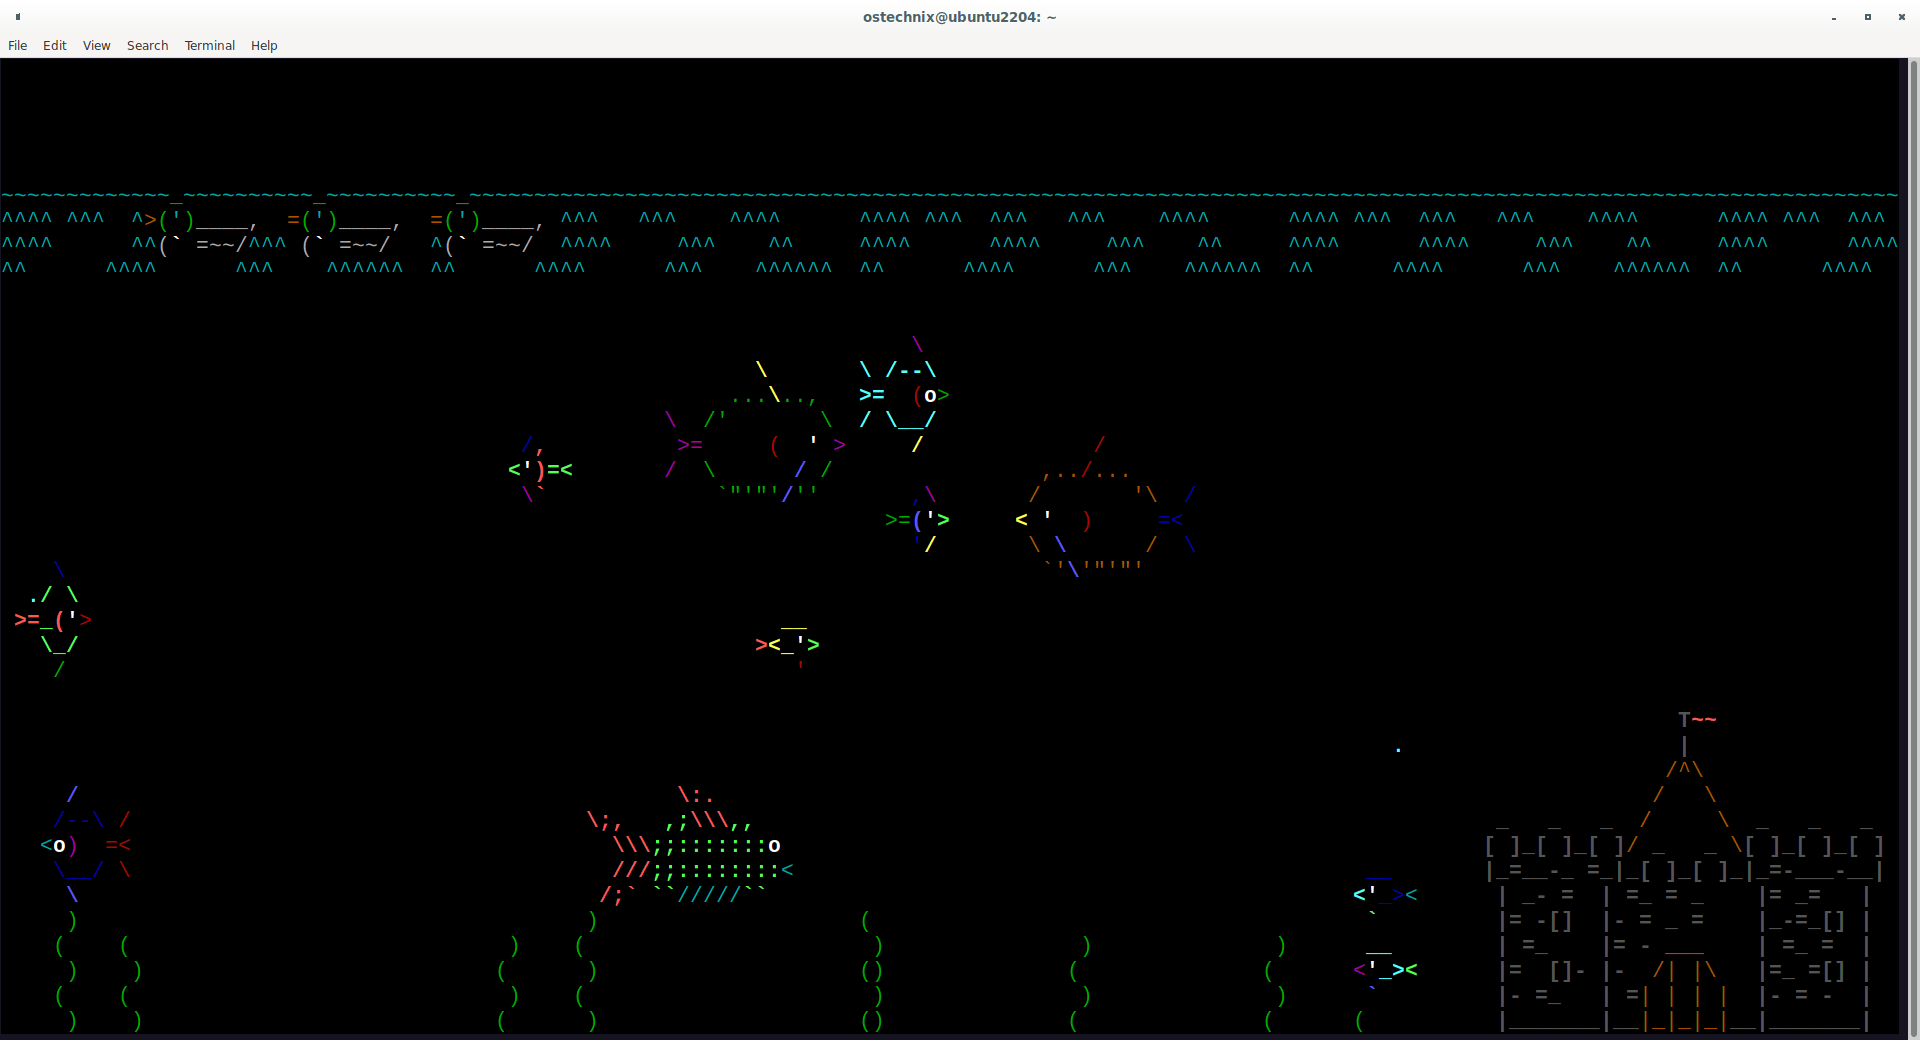
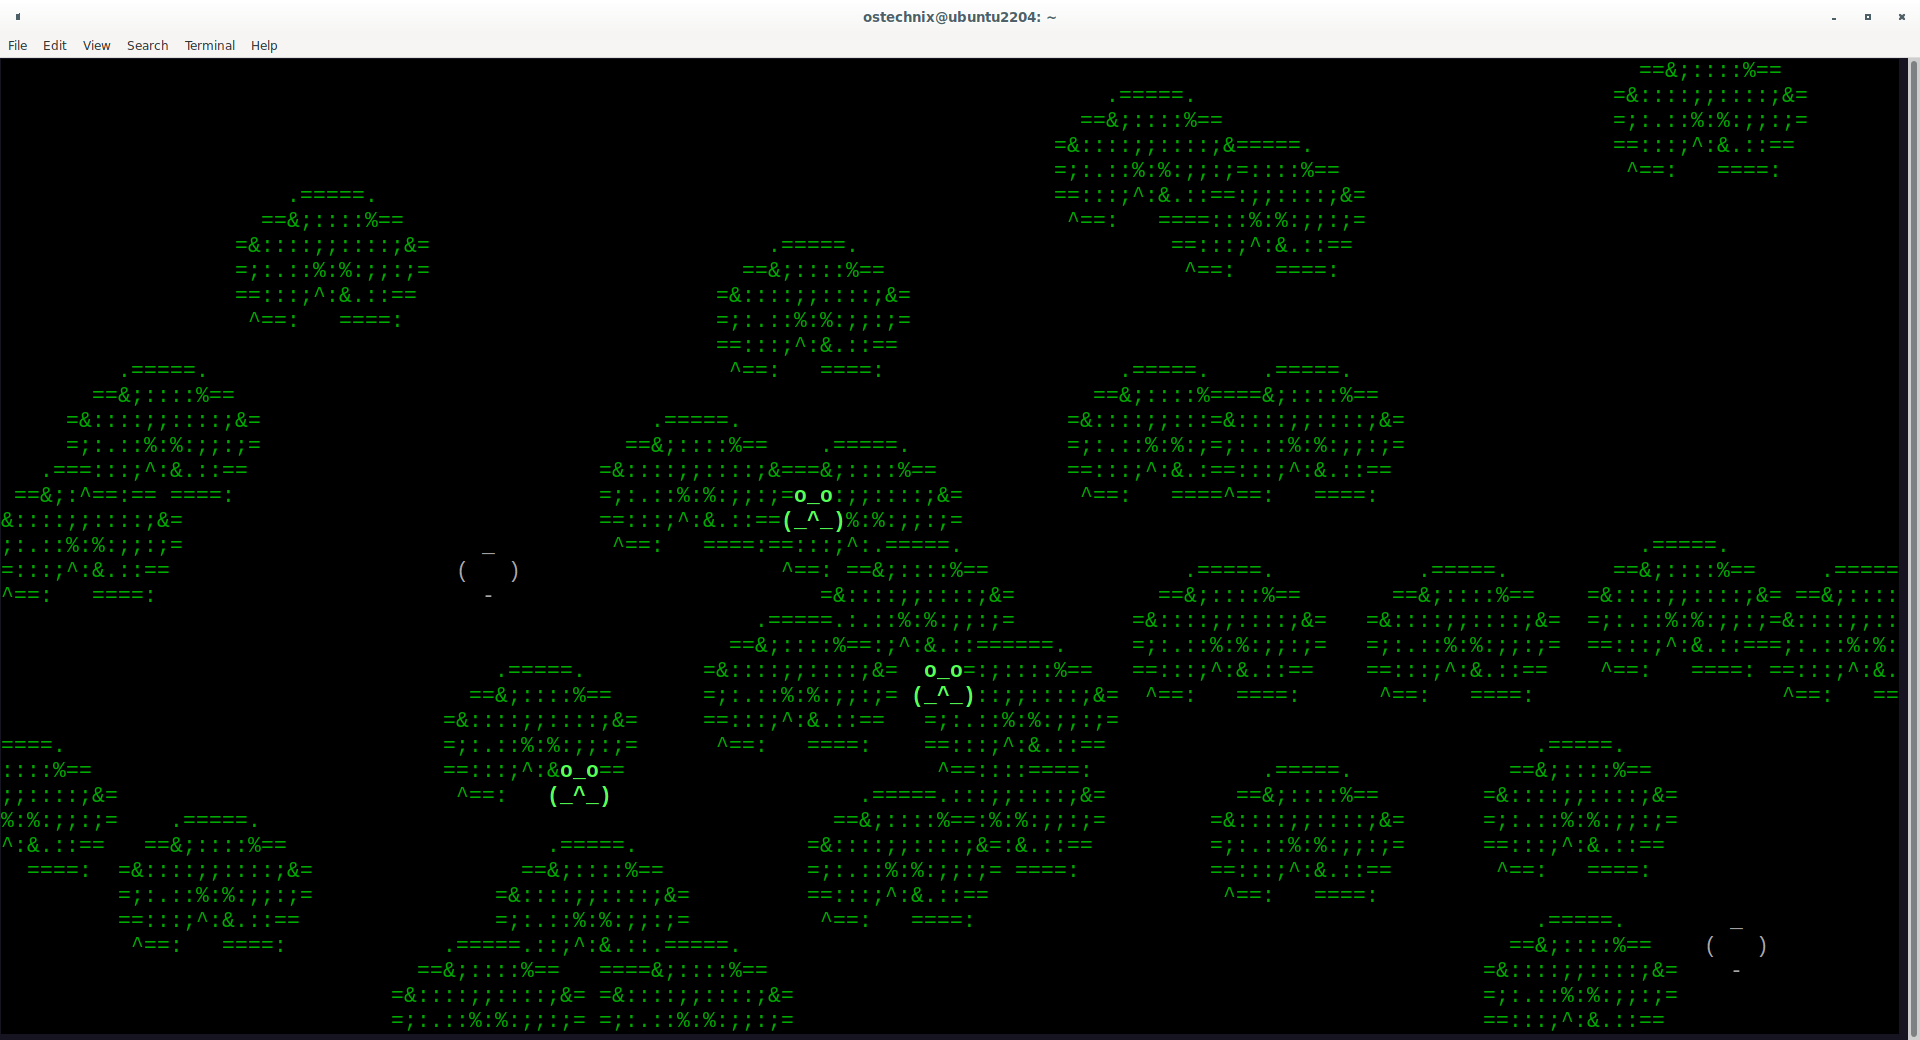
ASCIIquarium is a program that turns your terminal into a virtual fish tank, complete with ASCII art fish swimming around, creating a whimsical environment.
If you don't already have ASCIIquarium installed, you can typically install it using your Linux distribution's package manager. For example, on Ubuntu, you can install it using snap:
$ sudo snap install asciiquarium
After installation, simply run the asciiquarium command in your terminal:
$ asciiquarium
Once you run the command, your terminal screen will be transformed into a virtual fish tank with various ASCII art fish swimming around. You can watch the fish move and interact with each other in your terminal window. You will also see the Ducks and Ships floating on the water.
To exit ASCIIquarium and return to your regular command prompt, you can press Ctrl + C in your terminal.
ASCIIquarium is an entertaining way to add a bit of fun and creativity to your Linux terminal. It's especially enjoyable if you're a fan of aquariums or simply want a unique and playful experience in your terminal session.
6. CMatrix
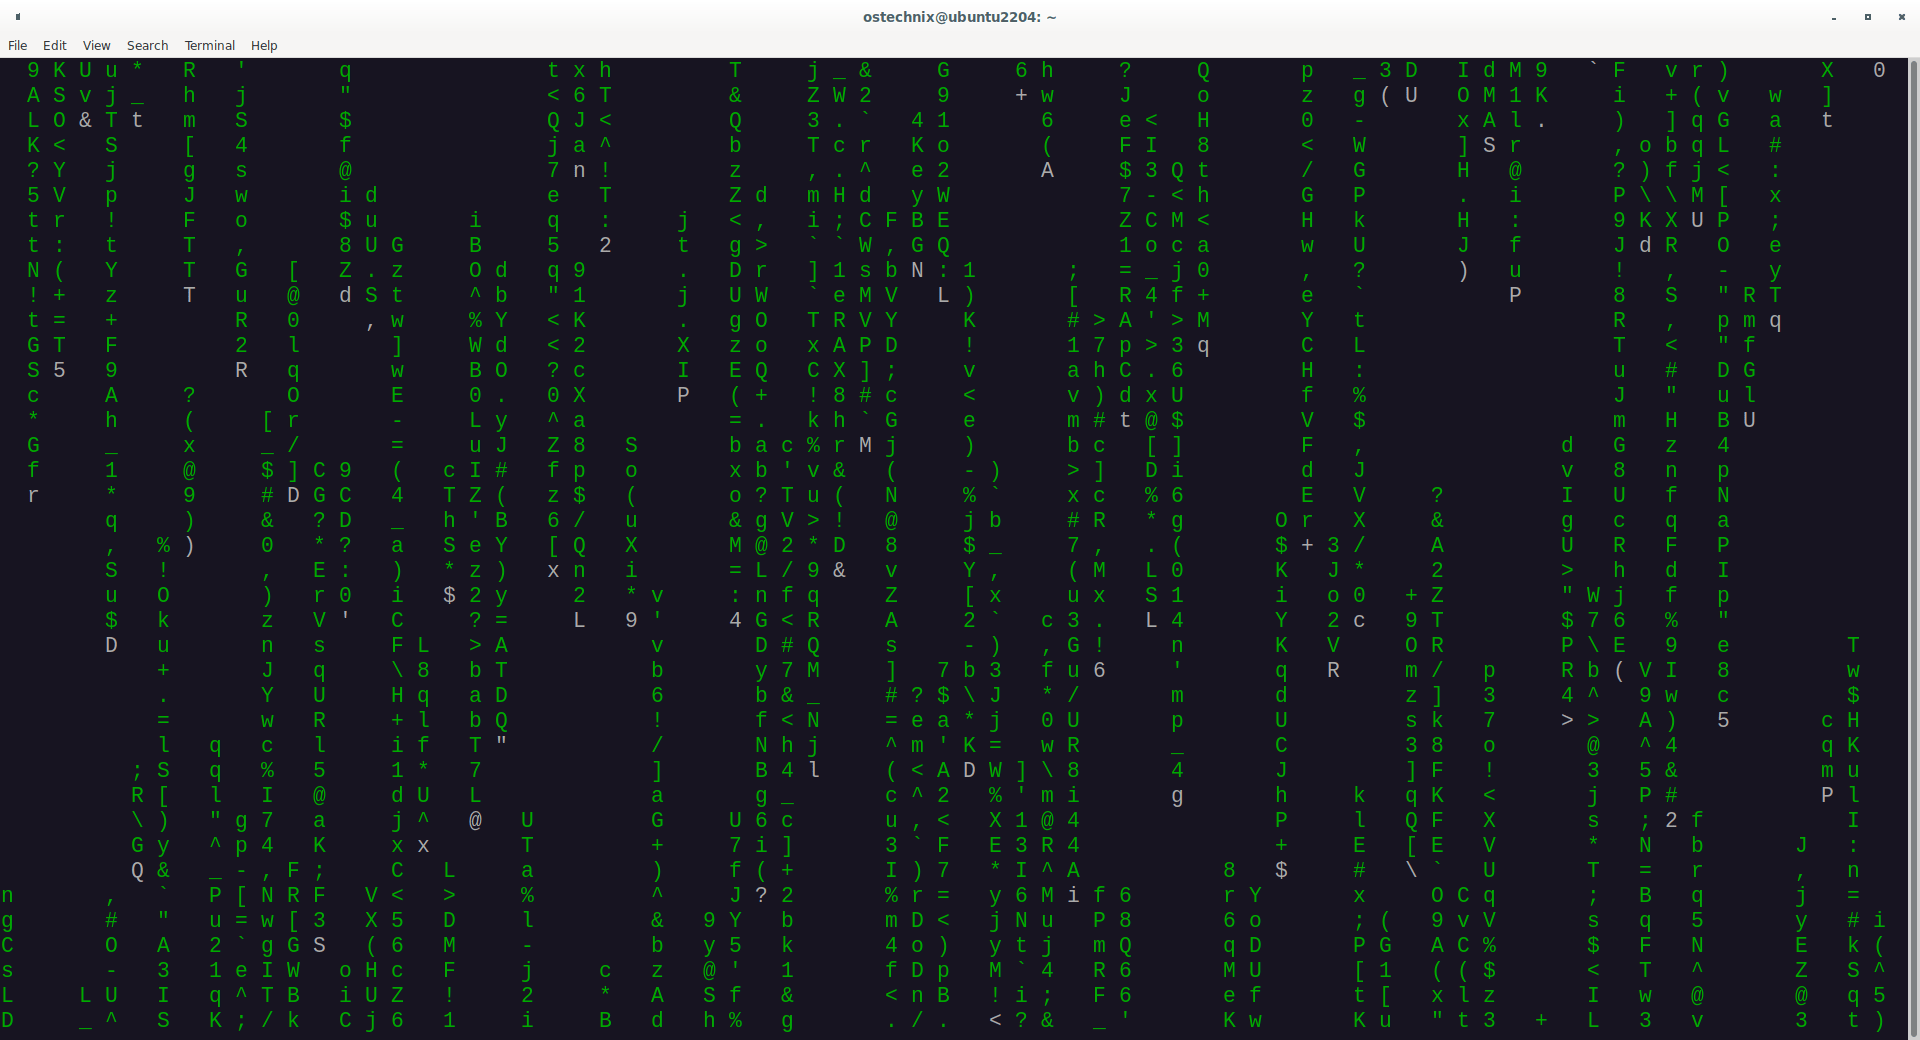
CMatrix is a command-line utility that simulates the "Matrix" movie's falling text effect, displaying scrolling characters in a green-on-black style.
Install the CMatrix package (if not already installed):
$ sudo apt install cmatrix
Basic Usage:
To start CMatrix with the default settings, simply run the cmatrix command:
$ cmatrix
This will launch CMatrix, and you'll see the scrolling text effect on your terminal.
To exit, simply press CTRL+C.
Change Text Colors:
You can change the colors of the falling text using the -C (for text color). For example, to use red text, run:
$ cmatrix -C red
Screensaver or Lambda Mode:
You can run CMAtrix in "Screensaver" mode, and exit it on first keystroke. To do so, the -s option.
$ cmatrix -s
Press any key to exit.
Similarly, you can run in lambda mode using -m option.
$ cmatrix -m
Change Scroll Speed:
You can adjust the scroll speed with the -s option followed by the number of milliseconds for each frame. For example, to slow it down to 100 milliseconds per frame:
$ cmatrix -s 100
Change Font Size:
You can change the font size with the -C option. For example, to use a larger font size:
$ cmatrix -C 3
Display the Code Rain Effect:
To simulate the "Matrix" code rain effect instead of the default text, use the -r option:
$ cmatrix -r
CMatrix Options:
There are a few other options exist to make your terminal more fun.
-a: Asynchronous scroll-b: Bold characters on-B: All bold characters (overrides -b)-c: Use Japanese characters as seen in the original matrix. Requires appropriate fonts-f: Force the linux $TERM type to be on-l: Linux mode (uses matrix console font)-L: Lock mode (can be closed from another terminal)-o: Use old-style scrolling
Exit CMatrix:
To exit CMatrix and return to your regular command prompt, simply press Ctrl + C in your terminal.
CMatrix is a fun and nostalgic utility that can create an eye-catching visual effect in your terminal. You can customize it to suit your preferences and enjoy the "Matrix" experience right in your command line.
7. Lolcat
lolcat is a fun utility that adds rainbow-colored text to your terminal output. Here are some usage examples:
If lolcat is not installed already, you can install it using command:
$ sudo apt install lolcat
Basic Usage:
To add rainbow colors to a text file or a command's output, simply pipe it to lolcat:
$ echo "Hello, OSTechNix Users!" | lolcat
This will display "Hello, lolcat!" with colorful rainbow text.
Please note that lolcat applies the rainbow color effect to longer text or multiple lines of text more effectively. For very short or single-line text, the rainbow effect might not be as noticeable or vibrant.
To fully appreciate the rainbow colors, it's better to use lolcat with longer or multiline text like below.
Force Colors:
By default, lolcat will use rainbow colors. To force color even when stdout is not a tty, use the -f option:
$ echo <Your-text-here> | lolcat -f
Rainbowify a File:
To add rainbow colors to the contents of a text file, you can use lolcat like this:
$ lolcat my_file.txt
Display the Manual Page in Rainbow Colors:
You can even read the lolcat manual page with rainbow colors:
$ man lolcat | lolcat
Pipe Multiple Commands:
You can pipe the output of multiple commands to lolcat for a colorful display. For example:
$ df -h | lolcat
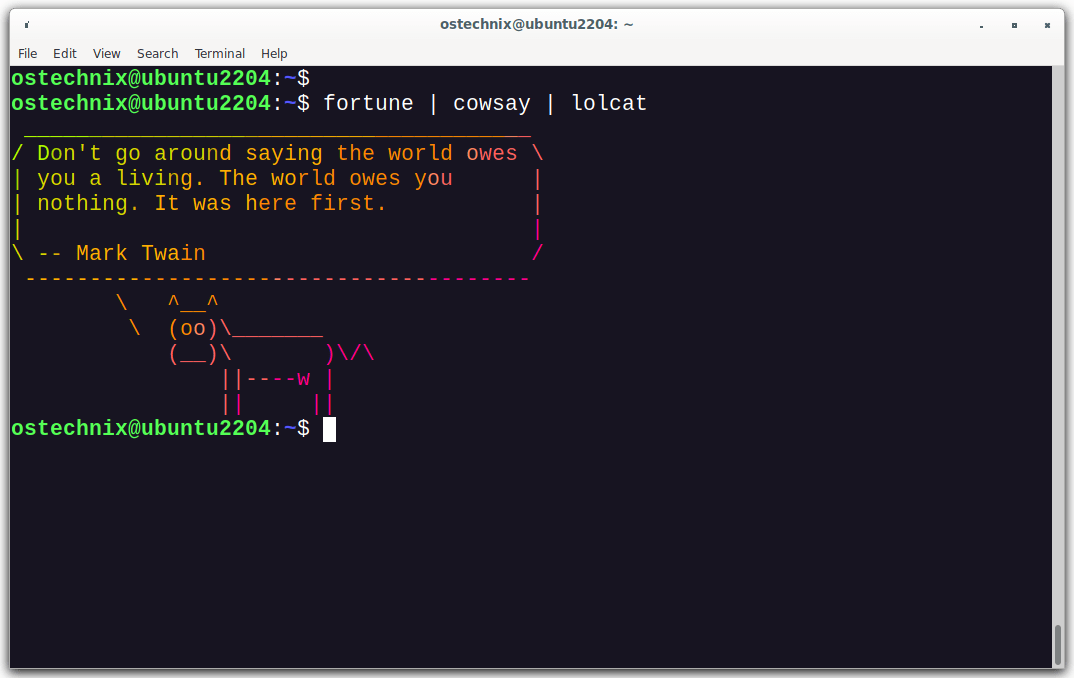
Here is an another example of combining fortune, cowsay and lotcat applications using pipes:
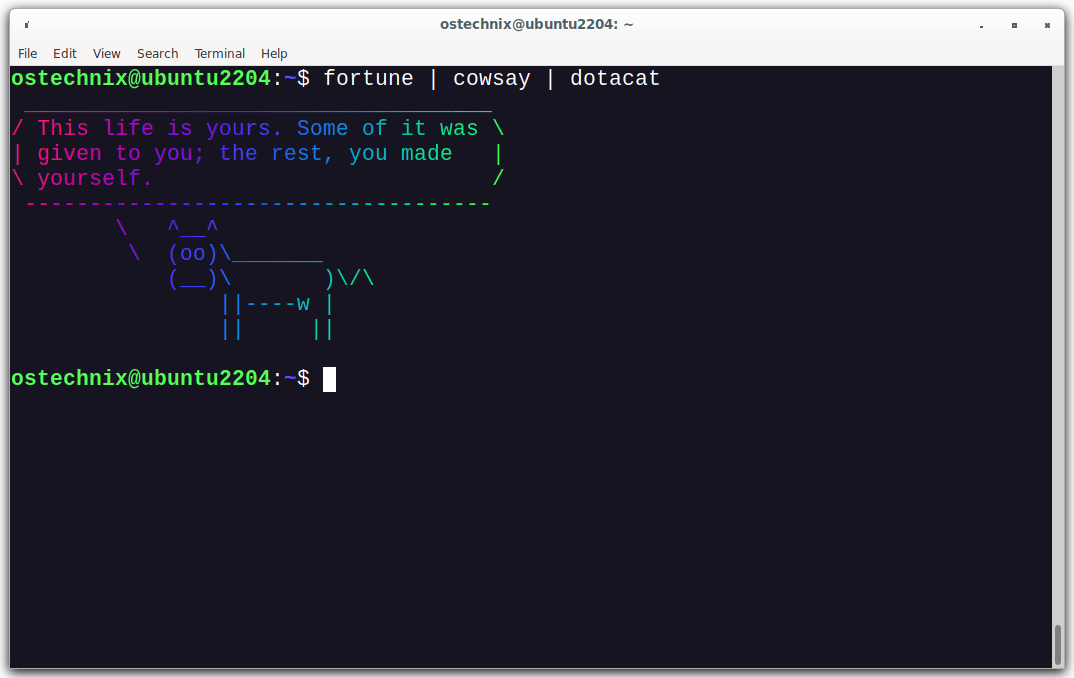
$ fortune | cowsay | lolcat
lolcat is a lighthearted utility that can add a touch of fun and color to your terminal. You can use it with various commands and texts to create visually appealing and rainbow-colored output.
8. Ponysay
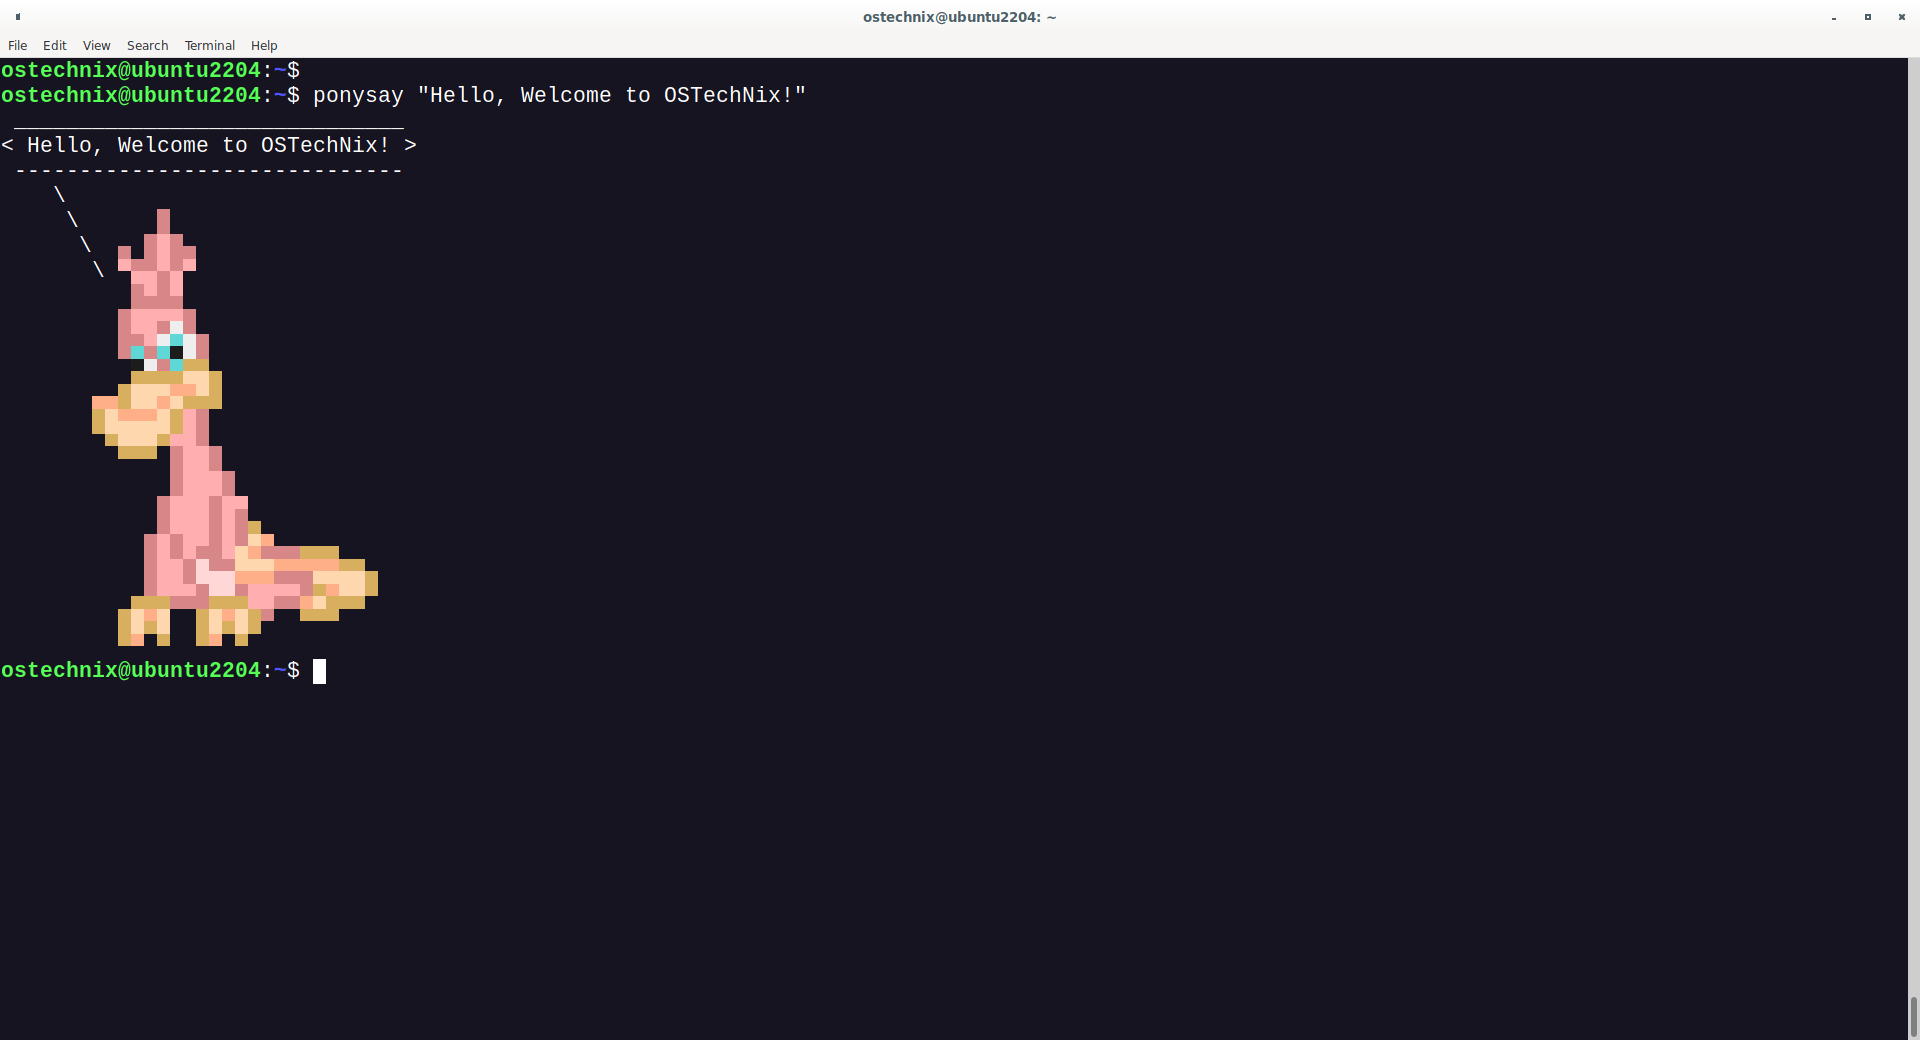
Ponysay is a rewrite of the program cowsay, but instead of cows it uses ponies. Ponysay can be used to print a message in the terminal, with the message appearing inside a pony.
Ponysay displays ponies from the show "My Little Pony: Friendship is Magic" in ASCII art, along with a message specified by the user. The pony can be customized to look like different characters from the show My Little Pony.
For example, you can make the pony look like Pinkie Pie or Twilight Sparkle. You can also specify a custom message for the pony to say.
It is written in Python 3 and can be installed on various systems including GNU/Linux, macOS, and Windows (via Cygwin or Windows Subsystem for Linux).
To install and use Ponysay in Linux, follow the steps below:
Make sure your system has the required runtime and package building dependencies. These typically include coreutils, python>=3, and texinfo.
Next, download the tarballs for Ponysay from its GitHub repository for either the bleeding edge version or from the releases section.
Alternatively, if you have git installed, you can clone the project using the following command:
$ git clone https://github.com/erkin/ponysay.git
Navigate to the Ponysay directory in the terminal and execute one of the following commands:
$ ./setup.py --freedom=partial install
or
$ python3 setup.py --freedom=partial install
If you prefer only completely free ponies, you can use --freedom=strict instead of --freedom=partial. Note that you might need to run these commands with sudo to install Ponysay system-wide.
if you're on Ubuntu, you install the snap version like below:
$ sudo snap install ponysay
Once installed, you can use Ponysay by typing:
$ ponysay "Hello, Welcome to OSTechNix!"
If you have a specific pony in mind, you can specify it using the -f flag, like so:
$ ponysay -f pinkie "Hello, Welcome to OSTechNix!"
$ ponysay -f twilight "Hello, Welcome to OSTechNix!"
9. Charasay
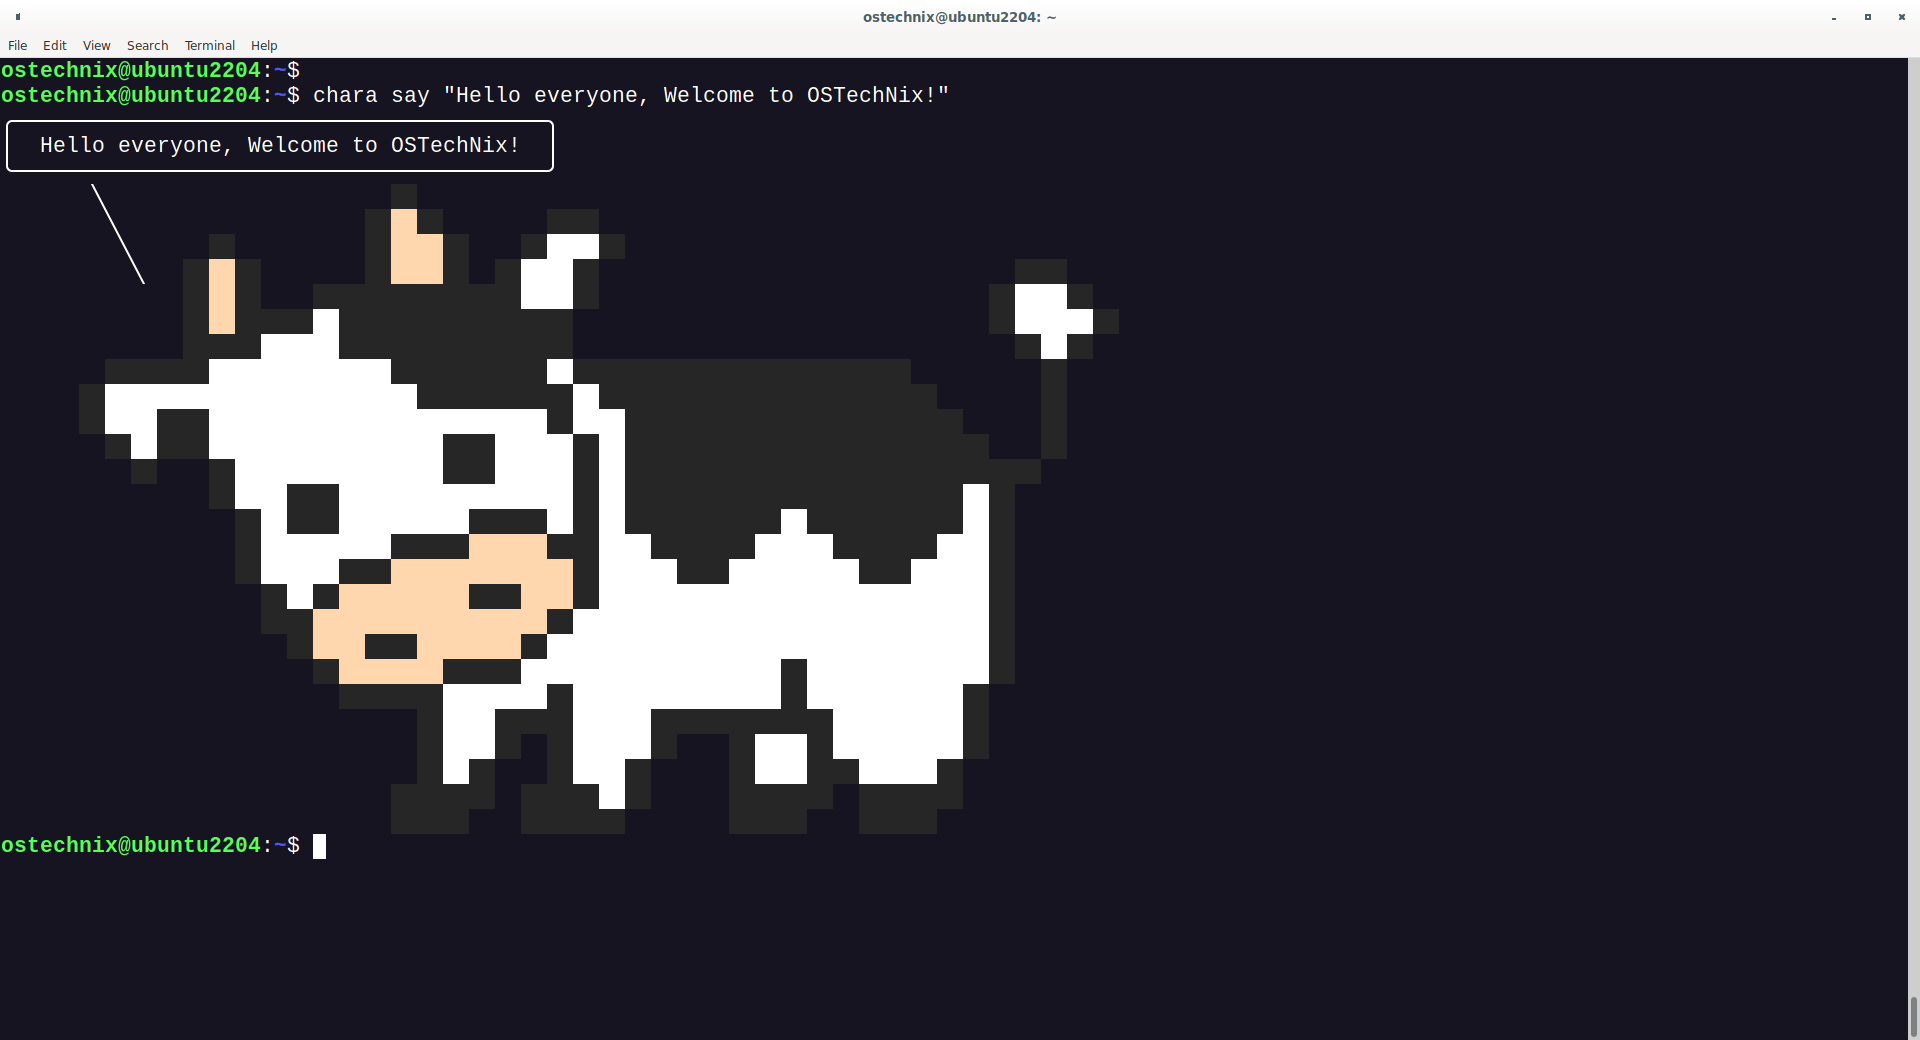
Charasay is a modern reimagination of the classic "cowsay" in Rust, designed to display colorful ANSI art characters in the terminal.
It offers a fresh, colorful take on the concept, suitable for those who frequently use terminal emulators and seek some visual entertainment.
To install Charasay on Linux, you can use the Cargo package manager, which is part of the Rust programming language ecosystem. If you don't already have Rust and Cargo installed, you'll need to set them up first as shown in the link below.
Once you have Cargo, you can install Charasay by running the following command in your terminal:
$ cargo install charasay
This will download and compile Charasay, making it available for use on your system.
If you use Arch Linux or its variants like EndeavourOS or Manjaro Linux, you can install from AUR using Paru or Yay tools.
$ paru -S charasay
Or,
$ yay -S charasay
Once installed, you can run chara say command followed by your preferred message. For example:
$ chara say "Hello everyone, Welcome to OSTechNix!"
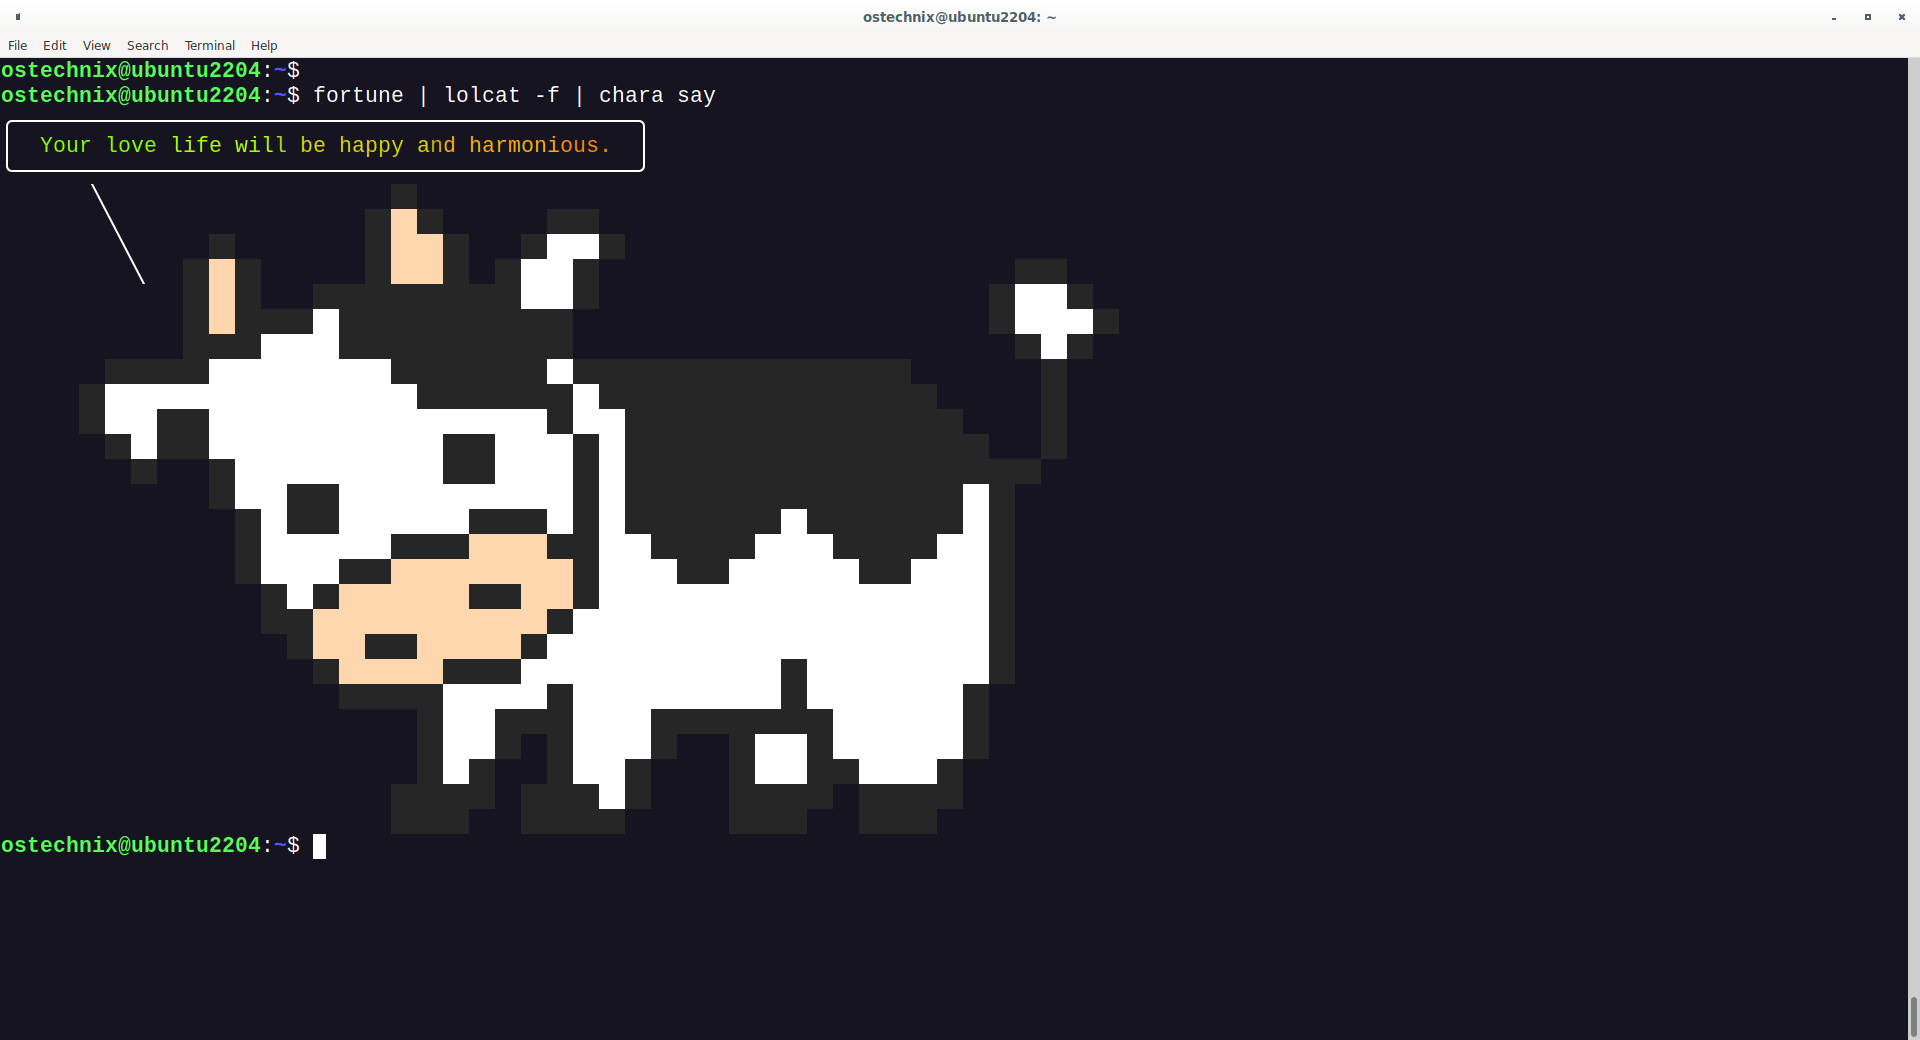
You can also combine Charasay with other programs like lolcat and fortune using pipe like below:
$ fortune | lolcat -f | chara say
For more details, check the official site.
10. Party Parrot
This is another fun project for command line users. The curl parrot.live utility is a fun and novel use of the curl command in Linux and Unix-like operating systems.
When you run curl parrot.live in the terminal, it connects to the parrot.live server and streams a frame-by-frame animation of a parrot, commonly known as the "Party Parrot".
$ curl parrot.live
The animation is rendered in ASCII art, making it compatible with any terminal that can display text. To exit, press Ctrl+C.
This utility showcases the creative use of curl for entertainment beyond its typical application in downloading files or querying web servers. It's a lightweight and amusing way to bring a bit of color and movement to the terminal.
11. Ternimal
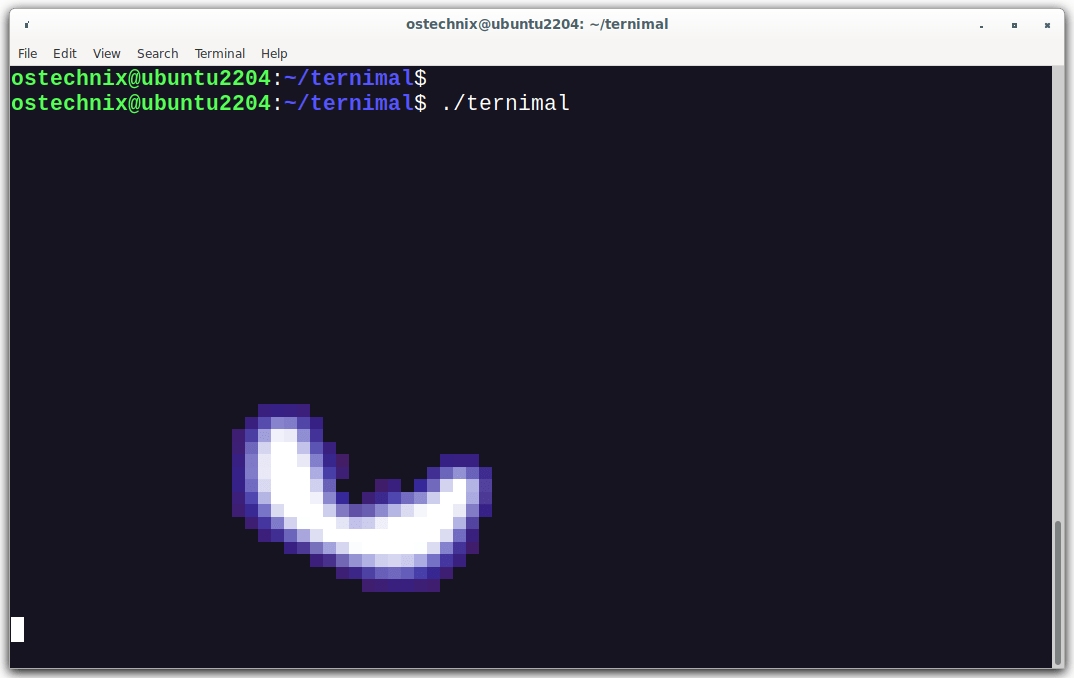
Ternimal (Please note the spelling. Not to be confused with Terminal application) is a CLI program that simulates a lifeform in the terminal. It's written in Rust and uses Unicode block symbols to draw animated, dynamic shapes that resemble living organisms.
Despite being lightweight and minimalistic, Ternimal incorporates advanced features like a glow renderer and skeletal deformation. The program is highly customizable through command-line parameters, allowing users to experiment with various forms and animations.
It's designed to be efficient, consuming minimal resources while offering high frame rates in compatible terminals. Ternimal's source code is available on GitHub.
To install ternimal, make sure you have installed Rust on your Linux machine. Once Rust is installed, run the following commands one by one to build ternimal:
$ git clone https://github.com/p-e-w/ternimal.git
$ cd ternimal
$ rustc -O ternimal.rs
Now, run ternimal using command:
$ ./ternimal
This will display a lifeform moving around the terminal screen.
You can also change the animation type (E.g. Anaconda) and set custom parameters such length, thinness, radius for the animation.
$ ./ternimal length=100 thickness=1,4,1,0,0 radius=6,12 gradient=0:#666600,0.5:#00ff00,1:#003300
For more details, look into the project's official GitHub repository.
12. Paclear
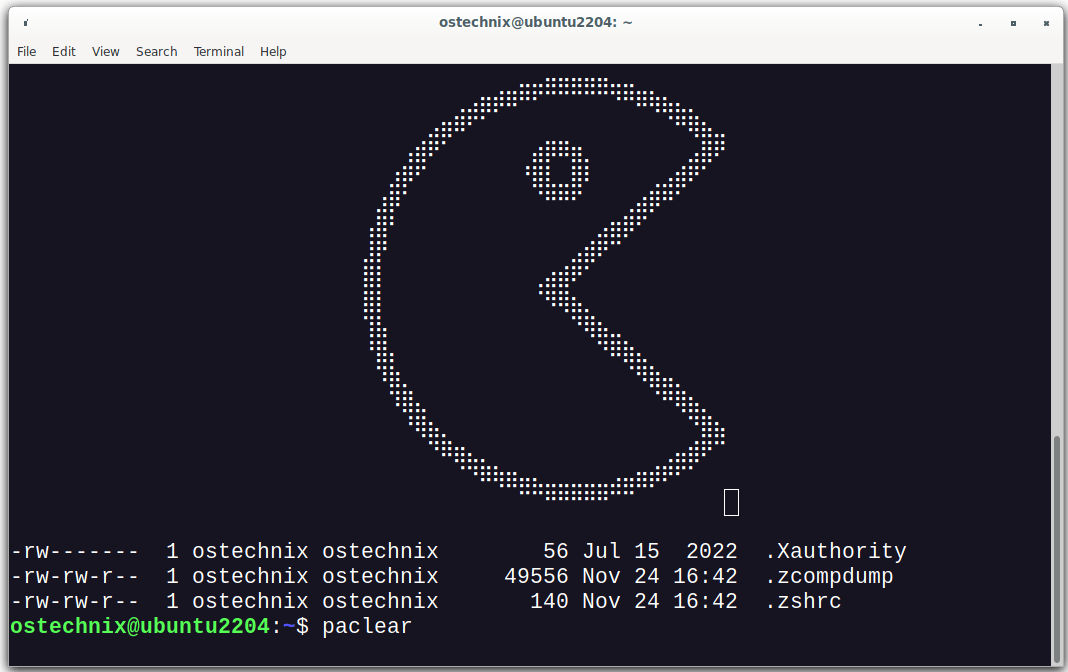
Paclear is a command-line utility that adds an entertaining twist to the classic 'clear' command by animating a PAC-MAN character across the terminal screen.
It's a fun and creative way to clear your terminal screen, bringing a bit of nostalgia and visual flair to an otherwise mundane task. Paclear allows customization of the PAC-MAN animation, including color and speed settings.
Paclear utility is a lighthearted and inventive take on terminal commands, suitable for users looking to add a bit of fun to their CLI experience.
It is free and opensource program developed in Go programming language.
Make sure Go language is installed in your Linux system. If not, refer the following link to learn how to install Golang in various Linux distributions.
After installing golang, run the following command to install Paclear on your system:
$ go install github.com/orangekame3/paclear@latest
Alternatively, you can download the latest Paclear binary from the releases page and put it on your PATH as shown below.
$ wget https://github.com/orangekame3/paclear/releases/download/v0.0.13/paclear_Linux_x86_64.tar.gz
Extract the tar file:
$ tar -zxvf paclear_Linux_x86_64.tar.gz
Make the paclear file as executable and move it to your $PATH:
$ chmod +x paclear
$ sudo mv paclear /usr/local/bin/
From now on, you can clear your terminal screen by running the following command:
$ paclear
Before clearing the screen, paclear will briefly show a PAC-MAN animation.
For more details, check its GitHub page.
13. Lavat
Lavat is a CLI program that simulates a lava lamp in the terminal. It uses a graphical concept called metaballs to create fluid, lava-lamp-like animations within a terminal window.
The program offers various customization options, such as setting the color, speed, radius, and number of metaballs. Users can interact with the simulation in real-time to change these parameters.
This creative tool combines programming and art to bring a dynamic and colorful display to the terminal environment.
Lavat is built with Termbox2 and is designed to run on Linux and Unix-like systems.
Lavat can be installed directly from its GitHub repository or via the AUR for Arch Linux users.
if you want to install directly from GitHub, make sure you have installed C compiler and make. If they are not installed already, you install them as shown in the following link.
Next, run the following commands one by one to install Lavat:
$ git clone https://github.com/AngelJumbo/lavat
$ cd lavat
$ make install
This will install the latest lavat and move it to your PATH.
The Arch users can install lavat from AUR using their preferred AUR helper tools like Paru or Yay.
$ paru -S lavat-git
Once installed, run lavat program to display Lava lamp simulation in the terminal screen:
$ lavat
For more details, visit the Lavat official GitHub page.
14. Pond
Pond is a creative CLI utility that simulates a pond ecosystem with flowering lilypads and frogs jumping around in the terminal. This project is aimed at offering a relaxing experience for users, blending programming with an appreciation for natural aesthetics in a digital environment.
Before installing Pond, make sure you have installed the development tools and ncurses library. For instance, if you're Debian and Ubuntu, you can run the following command to install them:
$ sudo apt install build-essential ncurses-dev
For other Linux distributions, refer the following links:
Once the prerequisites have been installed, git clone the pond repository:
$ git clone https://gitlab.com/alice-lefebvre/pond/
This clone the contents of pond repository in a local directory named "pond". Cd into the pond directory and run the following command to install pond:
$ cd pond
$ make
$ sudo make install
After installing pond, you run the following command to display the pond-like ecosystem within your Terminal window:
$ pond
Press q to quit.
For more details, head over to its official GitLab page:
15. Cbonsai
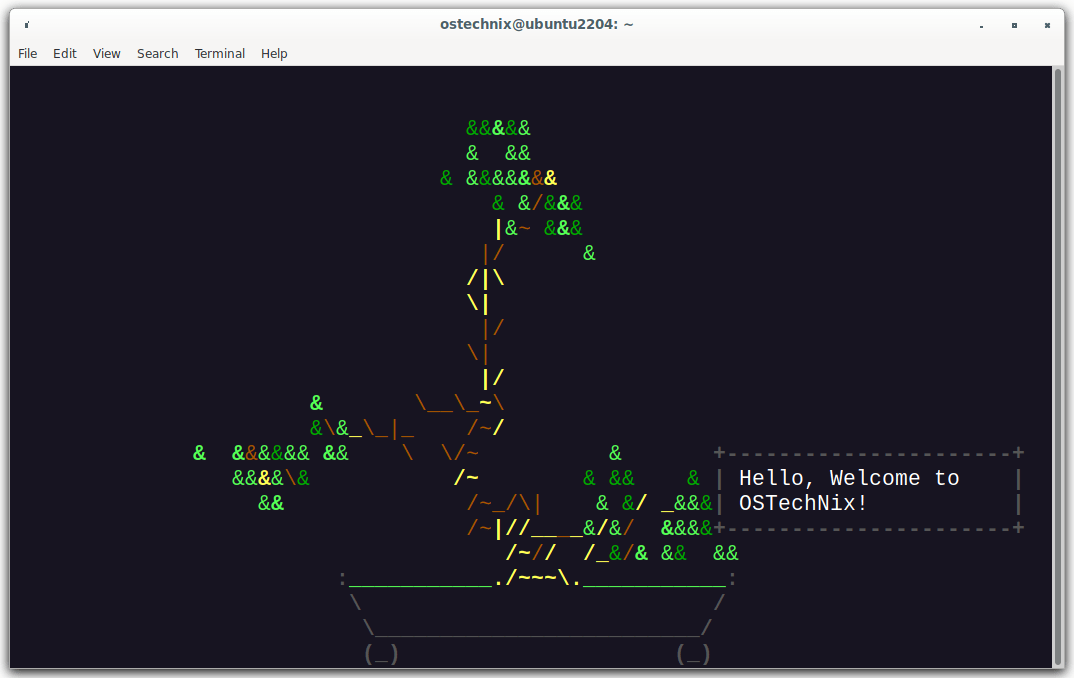
Cbonsai is a CLI Bonsai tree generator. It simulates the growth of a bonsai tree in the terminal. It is written in C and allows users to customize various aspects of the tree, including size and growth pattern.
Cbonsai is packaged for many Linux distributions, including Alpine Linux, Arch Linux (via AUR), Debian (via testing repository), Fedora (via Copr), Void Linux etc. So you can install using your distribution's default package manager.
For example, on Arch Linux, you can install cbonsai from AUR using Paru or Yay:
$ paru -S cbonsai
Or,
$ yay -S cbonsai
Fedora:
$ sudo dnf copr enable keefle/cbonsai
$ sudo dnf install cbonsai
Debian, Ubuntu and derivatives:
$ sudo apt install cbonsai
Make sure you have enabled [testing] repository in Debian.
If cbonsai is not available for your Linux distribution, you can install it manually like below. Make sure you have installed ncurses on your Linux distribution.
Git clone the cbonsai repository:
$ git clone https://gitlab.com/jallbrit/cbonsai
Cd into the cbonsai directory:
$ cd cbonsai
To install cbonsai for the current user, run:
$ make install PREFIX=~/.local
To install it for all users, run:
$ sudo make install
Once installed, you can grow beautiful bonsai tree inside your Terminal window by running the following command:
$ cbonsai
There are 2 modes of operation: static (see finished bonsai tree), and live (see growth step-by-step).
When you run cbonsai without any options, it will display a finished (static) tree. If you want to show each step of bonsai tree growth, add -l, --live flag:
$ cbonsai -l
For continuous growth of the tree, you can add -i, --infinite flag:
$ cbonsai -i
In infinite mode, the wait between each tree generation is 4 minutes. You can set the custom wait time between generating each new tree using -w, --wait=TIME option.
You can display custom message next to the tree using -m option like below:
$ cbonsai -m "Hello, Welcome to OSTechNix!"
The other cool thing that you can do with Cbonsai is to run cbonsai in screensaver mode with certain defaults.
To do so, run cbonsai with -S, --screensaver flag:
$ cbonsai -S
To exit, press any key.
Cbonsai is quite customizable. You can define the plant base to use, number of leafs and branches etc.
For details, refer its help section:
$ cbonsai --help
Also, look into the project's GitLab:
16. Dotacat
Dotacat is a utility similar to lolcat, designed to display colorful output in the terminal. Its main advantage is speed, as it's optimized for faster performance compared to lolcat.
The dotacat utility is likely used for enhancing the visual appeal of terminal output with a variety of colors, making it a useful tool for users who enjoy customizing their command line interface.
Dotacat is written in Rust programming language.
To install Dotacat, make sure you have installed Rust on your Linux system.
After installing Rust, use Cargo package manager to install dotacat:
$ cargo install dotacat
Once installed, you can use dotacat to make colorful, rainbow output in the Terminal.
$ man find | dotacat
You can also pipe the output of multiple commands to dotacat and display the output in rainbow colors:
$ fortune | cowsay | dotacat
Refer the project's GitLab page for more details.
17. Finger
The finger command is a command-line tool in Linux and Unix-like operating systems that allows users to retrieve information about users currently logged into a system or obtain details about a specific user. It can display information such as the user's full name, login time, terminal, and more.
Installation:
Check if finger is already installed by opening a terminal and running the following command:
$ finger
If it's not installed, you'll likely see a message like "Command 'finger' not found."
To install finger, use your Linux distribution's package manager. For example:
On Debian/Ubuntu-based systems:
$ sudo apt install finger
On Red Hat/Fedora-based systems:
$ sudo dnf install finger
Once finger is installed, you can use it to retrieve information about users in the following ways:
List All Users on the System:
To list all users currently logged into the system, use finger without any arguments:
$ finger
This will display information about all users, including their username, full name, terminal, login time, and more.
Retrieve Information for a Specific User:
To obtain information about a specific user, simply provide their username as an argument to the finger command:
$ finger username
Replace username with the actual username you want to query.
For instance, if you want to get the details of a user called 'ostechnix', the command would be:
$ finger ostechnix
Display Information for a Remote User:
You can use finger to query user information on a remote system by specifying the hostname or IP address of the remote system and the username:
$ finger username@hostname
Replace username with the remote user's username and hostname with the remote system's hostname or IP address.
Display Short Format Information:
By default, finger displays detailed information about users. To display a shorter format, use the -s option:
$ finger -s username
The finger command can be a useful tool for obtaining basic information about users on a Linux system, but please note that its usage may be limited or disabled on some systems due to security concerns. Always ensure that you have the necessary permissions to use finger and respect privacy and security policies when using it.
18. Pinky
pinky is a lightweight alternative to the finger command. Both finger and pinky provide information about users on a system, but pinky typically offers a more concise and minimalistic output compared to the more detailed information provided by finger.
pinky is often included as part of the basic system utilities on many Linux distributions, so you might not need to install it separately. Just in case, if it is not installed, you can install Pinky in Linux using your distribution's default package manager:
Arch Linux / EndeavourOS / Manjaro Linux:
$ sudo pacman -S pinky
Debian / Ubuntu:
$ sudo apt install pinky
Fedora / Red Hat:
$ sudo dnf install pinky
Usage:
To use pinky, open a terminal and enter the following command:
pinky [username]
- If you provide a
usernameas an argument,pinkywill display information about that specific user. - If you don't specify a
username,pinkywill list information about all users currently logged into the system, including their username, terminal, login time, and idle time.
Here's a simple example:
$ pinky
This command will list information about all users currently logged in.
And here is another example of getting a specific user's (E.g. ostechnix) information:
$ pinky ostechnix
pinky is a straightforward utility that can be handy for quickly checking who is logged into a Linux system or obtaining basic user information without the more extensive details provided by finger. It's often considered a lightweight alternative when you need a quick overview of user activity on a Linux system.
19. No More Secrets
In case you're unfamiliar, there's a scene in the movie 'Sneakers' where a team of security experts, specializing in testing security systems, retrieves a top-secret black box capable of decrypting all existing encryption systems worldwide.
The 'No More Secrets' (shortly nms) utility simply simulates how exactly the data decryption effect scene looks like on Sneakers movie in your Terminal.
To know how to use nms, refer the following guide:
No More Secrets – Recreate Famous Data Decryption Effect Seen On Sneakers Movie
20. Hollywood
Hollywood is another cool CLI utility that I found years ago. The Hollywood utility will transform your Ubuntu Linux console into a true Hollywood-style technical melodrama hacker interface.
When you run this utility, it fills your console with Hollywood melodrama technobabble wallstreet and also with Wall Street-like news and stats.
Check our our guide to know how to use this cool utility in Ubuntu Linux.
Turn Your Ubuntu Terminal Into A Hollywood Technical Melodrama Hacker Interface
21. Bucklespring
Are you still using any IBM mechanical keyboards? I have cool recommendation for you! Say Hello to Bucklespring, an open-source project that emulates the sound of a bucklespring keyboard.
Bucklespring keyboards are mechanical keyboards that use a spring mechanism to actuate the keys. They are known for their distinctive clicking sound, which some people find satisfying.
The bucklespring program runs as a background process and plays back the authentic sound of each key pressed and released on your keyboard, just as if you were using an IBM Model-M.
It also simulates the proper distance and direction for a realistic 3D sound palette of pure nostalgic bliss. Believe or not, this program creates a pure, realistic bucklespirng sound experience, especially with headphones on.
Want to try it? Please have a look at the following link right away!
22. bb
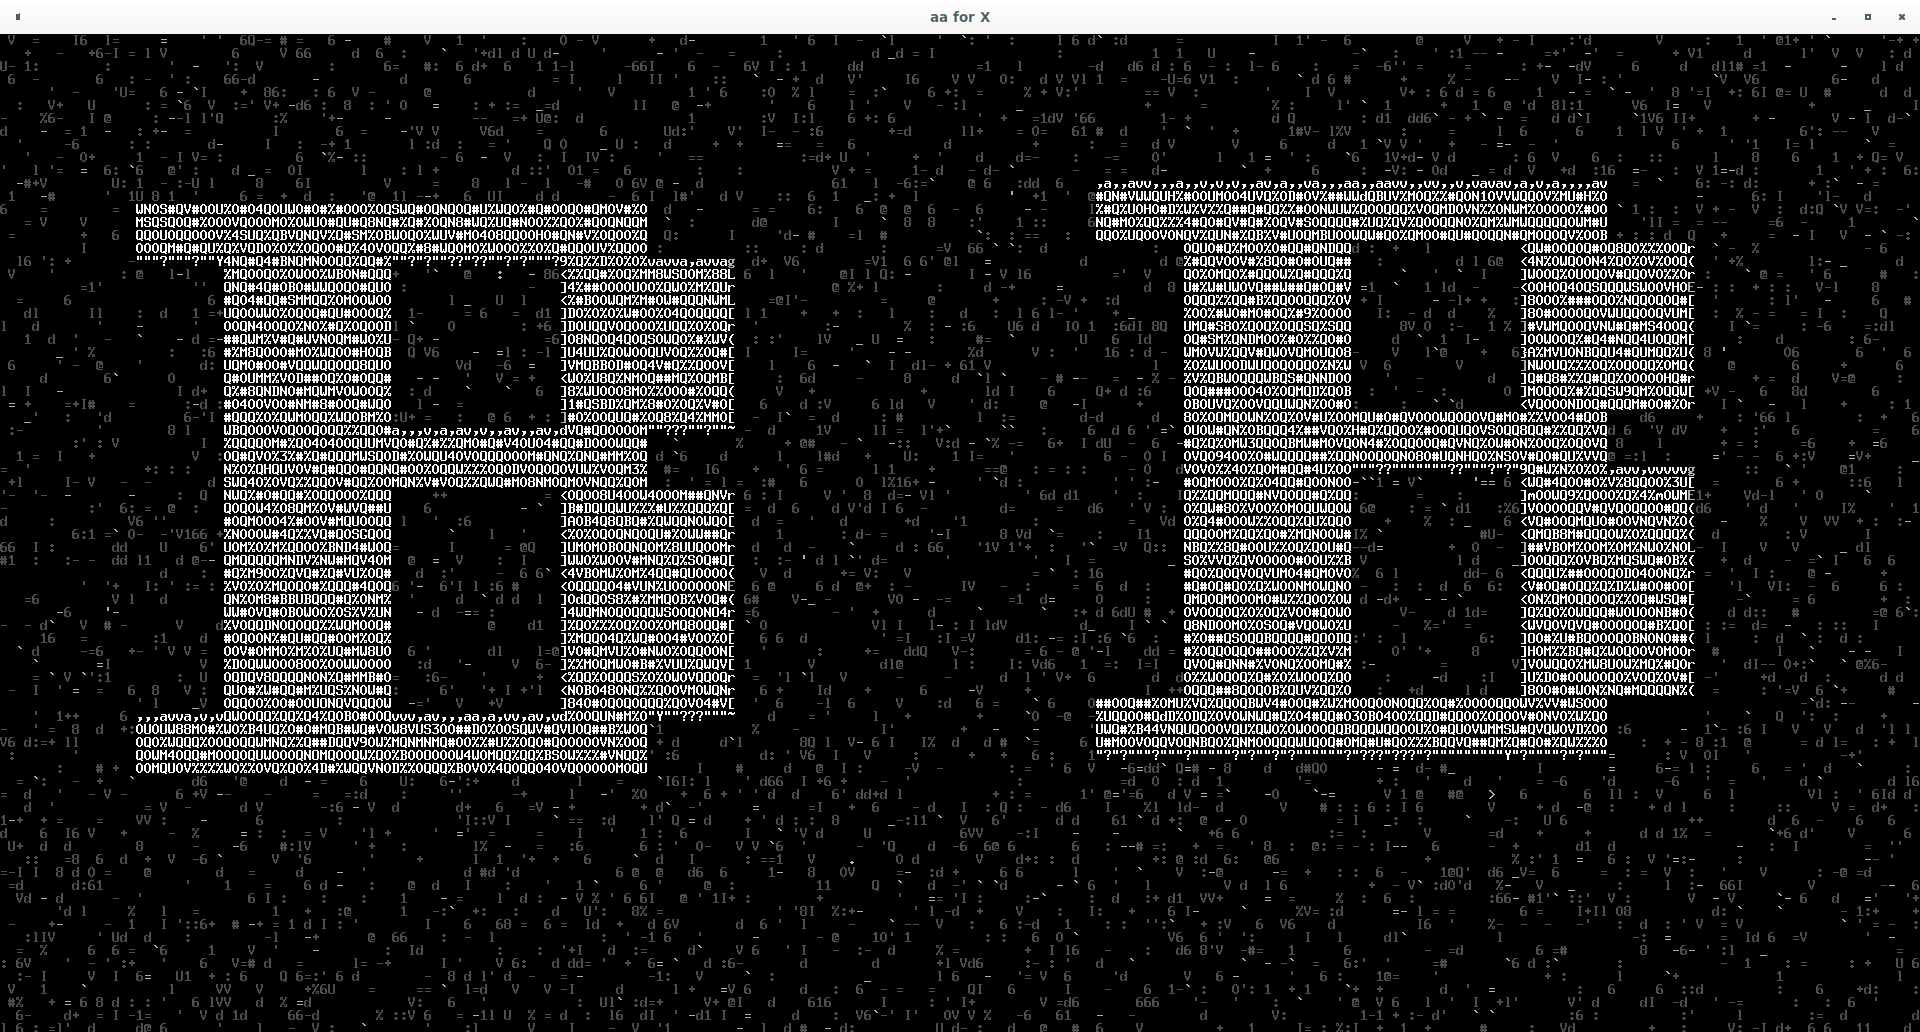
"bb" is an ASCII-art demo designed for text terminals, offering a cool audio-visual experience. It showcases the capabilities of ASCII art in creating engaging visuals accompanied by sound, using the limited graphical capabilities of text-based terminals.
This program demonstrates the creative potential in using basic characters to render detailed and dynamic scenes, making it an interesting tool for those who appreciate the artistry possible within the constraints of simple terminal displays.
bb is available in the default repositories of Debian, Ubuntu and its derivatives. To install bb, run:
$ sudo apt install bb
After installing it, run bb to display the ASCII-art demo. You will be prompted if you want music on. Typing "y" will enable the music. If you don't want music, simply type "n".
$ bb
23. TOIlet
The "TOIlet" is a command-line tool used for creating colorful and large text banners. It's often used to display large, stylized text in terminal sessions for decorative or informational purposes.
"TOIlet" utility comes with various options to control the font, color, and filter for the text. It's similar to the "FIGlet" utility but offers more advanced features like Unicode support and color output.
"TOIlet" stands for "The Other Implementation's letters." This name is a playful reference to "FIGlet," which stands for "Frank, Ian, and Glen's letters".
It is packaged for almost all Linux distributions. To install TOIlet in Linux, use any one of the following commands depending upon the Linux distribution you use:
Arch Linux, EndeavourOS, Manjaro Linux:
$ sudo pacman -S toilet
Debian, Ubuntu, Pop!_OS:
$ sudo apt install toilet
Fedora, Red Hat:
$ sudo apt install toilet
openSUSE:
$ sudo zypper install toilet
Here are some key features and uses of the "TOIlet" utility:
Text Banners: "TOIlet" is often used to create decorative text banners. You can input any text, and "toilet" will render it using ASCII art fonts, making it visually appealing.
$ toilet Welcome
Custom Fonts: The utility provides a wide range of fonts and styles to choose from. You can select different fonts to give your text a unique look. For example:
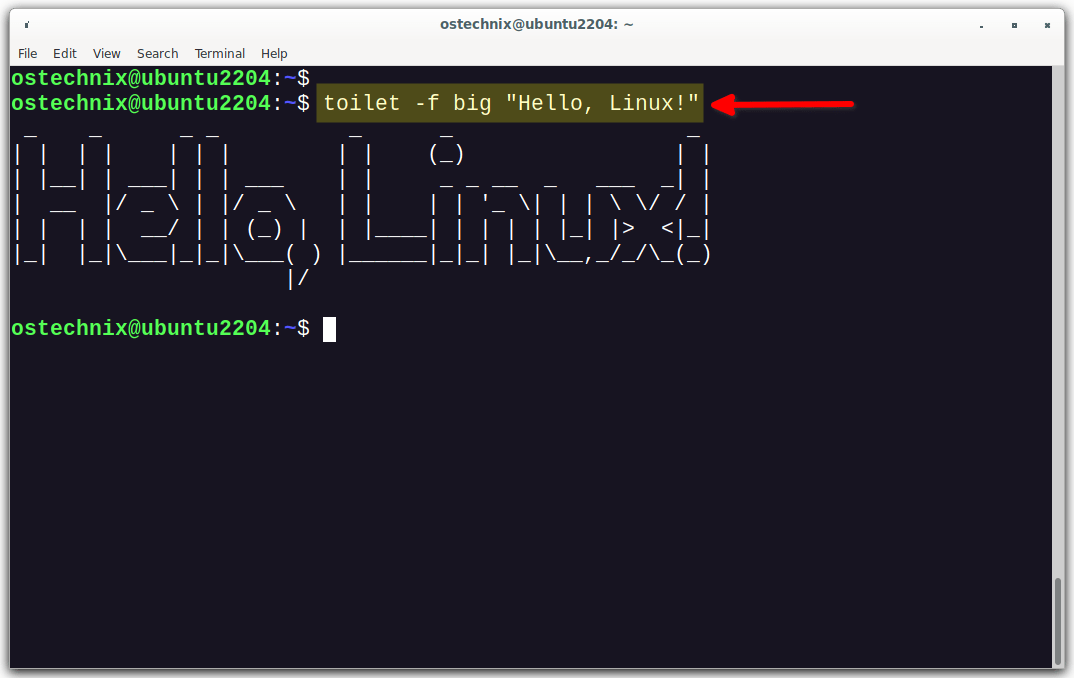
$ toilet -f big "Hello, Linux!"
Colorful Text: You can add colors to your text using filters option. This allows you to create eye-catching and colorful banners:
$ toilet -F metal "Colorful Text"
For more filters, run:
$ toilet --filter list
Alignment: "TOIlet" offers options to align your text in various ways, including left and right alignment.
$ toilet -F left "Left Aligned Text"
$ toilet -F right "Right Aligned Text"
Border: You can cover the text with "border" filter.
$ toilet -F border "Linux is a Kernel"
Word Wrap: The utility can automatically wrap your text to fit within the specified width, making it suitable for different display contexts.
Output to Files: You can save the generated text art to a file for later use or inclusion in documents, scripts, or websites:
$ toilet "Artistic Text" > text_art.txt
Figlet-Compatible: "TOIlet" is often used as a more feature-rich alternative to the "FIGlet" command, providing additional customization options and flexibility in text rendering.
Linux Terminal ASCII Art: It's frequently employed to create ASCII art representations of text suitable for Linux terminal headers, welcome messages, or other text-based design elements.
Here's a basic example of using "TOIlet" to create a decorative text banner:
$ toilet -f big -F metal "Linux Art"
This command generates the text "Linux Art" using the "big" font and the "metal" color scheme.
The "TOIlet" utility is not only entertaining but also practical for creating visually appealing text-based designs and decorative elements in the Linux terminal. It's often used by users who want to add a touch of creativity and style to their text-based presentations, scripts, or messages.
Both "TOIlet" and "FIGlet" are utilities for creating decorative text banners and ASCII art with customizable fonts and styles in the Linux and Unix terminal environments.
More information can be found in the following link:
24. Sl-alt
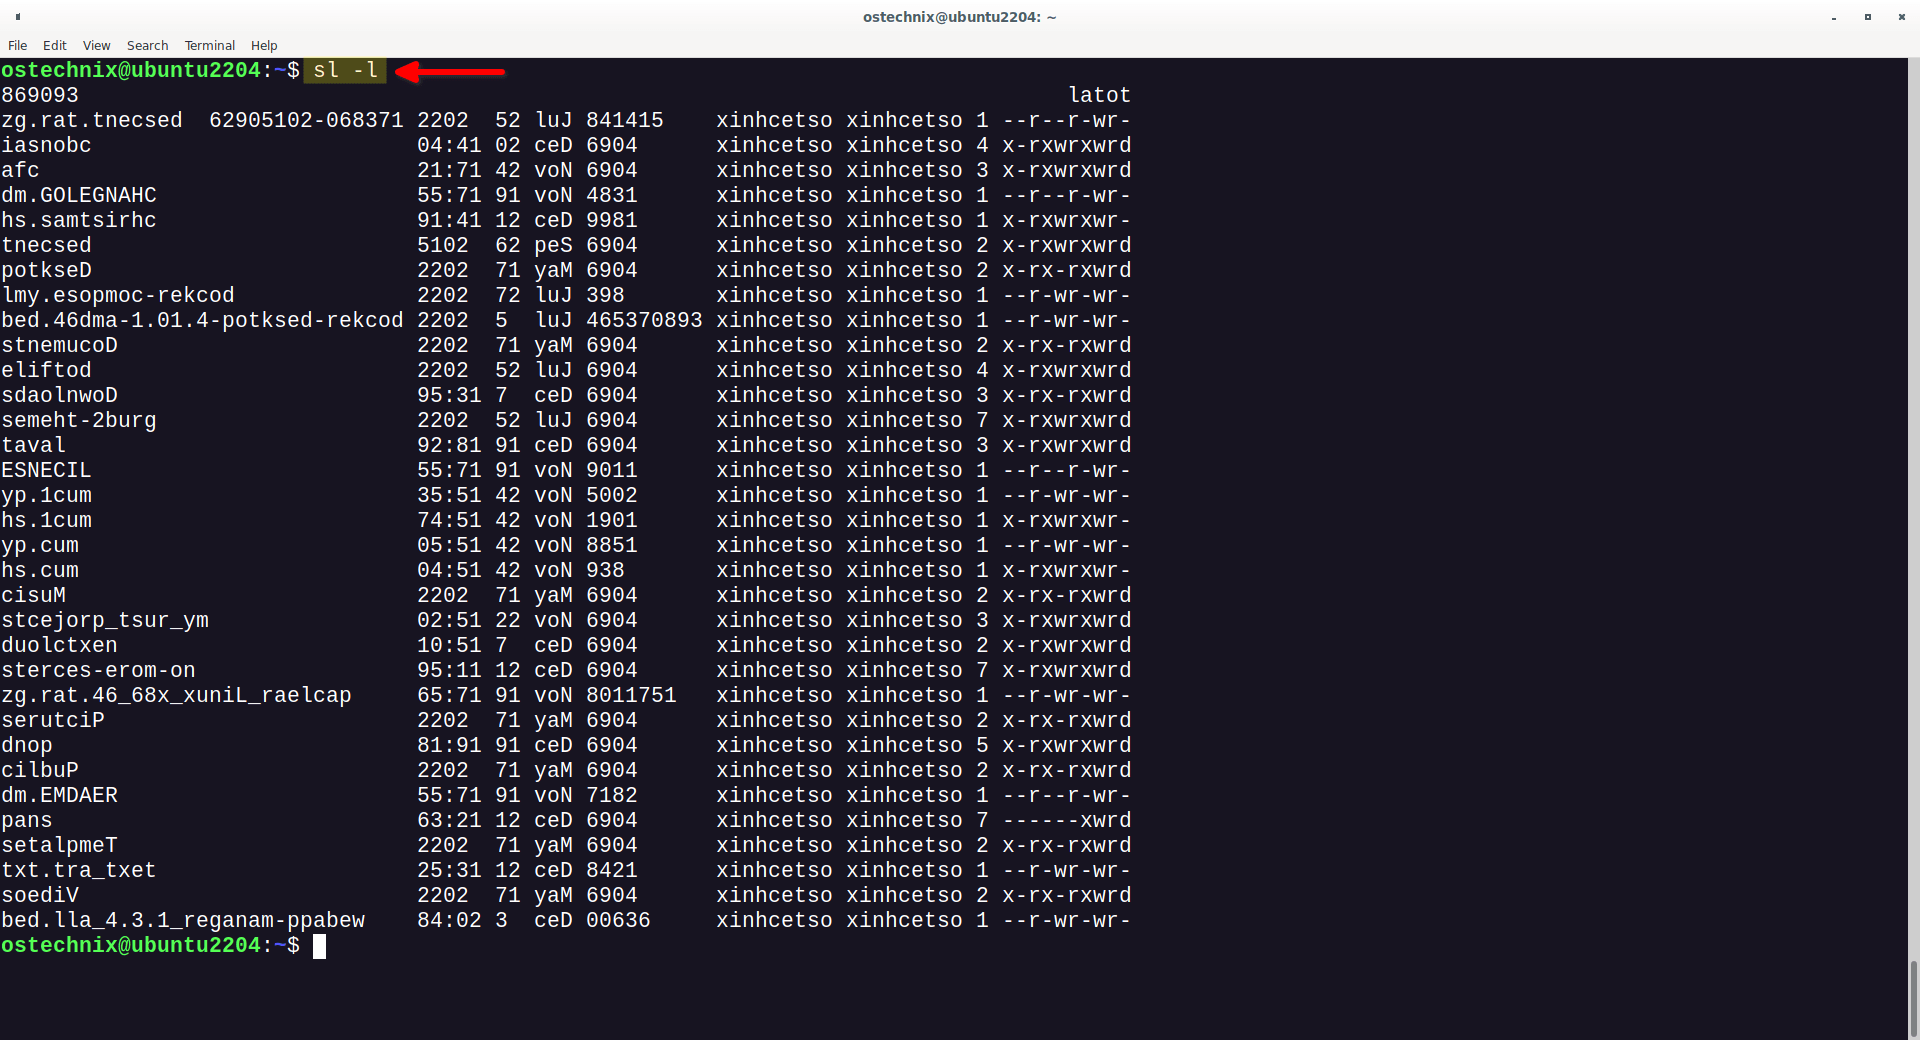
The sl-alt utility is a playful twist on the common Unix ls command. Instead of listing directory contents in a standard format, sl mirrors the output of ls, displaying it in reverse.
This tool was created as a fun alternative to the "Steam Locomotive" (sl) program, which is known for displaying an ASCII art steam locomotive in the terminal as a humorous response to the common mistyping of ls.
The sl-alt utility accepts most arguments that the regular ls command does and is particularly amusing when used with the -l (long listing) option.
This mirrored output version of ls adds a quirky and entertaining aspect to viewing directory contents.
To make it work, remove the existing sl utility if it is already installed. Go to its website (link below) and copy the source code and paste it in text file named sl.
Make the file executable and move it to your PATH:
$ chmod +x sl
$ sudo mv sl /usr/local/bin/
Now run sl -l and you will see the ls -l command's output in reverse!
For more details, visit the project's web page:
25. Fetch Utilities
The fetch utilities like Neofetch are not necessarily useless. They can be quite useful for quickly retrieving and displaying system information in a visually appealing way.
However, their usage often comes down to personal preference, and not everyone uses them regularly. Some users may find them helpful for easily accessing system details, while others might prefer more traditional Linux commands (E.g. uname) for the same purpose.
Of course, I also have installed Neofetch in my system. But I used it only a couple of times. As far as I noticed, the fetch utilities are being used to merely show off the system information to others.
For the complete list of fetch utilities, refer the following link:
26. Telehack
Telehack is a website that provides a simulated environment reminiscent of a vintage computer system or terminal. It's designed to look and feel like an old-school computer system, complete with text-based interfaces, commands, and a simulated dial-up connection experience.
Users can explore this virtual environment, interact with various commands and programs, and even experience simulated online activities from the past.
It's essentially a nostalgic and educational platform that allows users to get a sense of what using computers and the internet was like in the earlier days of computing.
Here are some key features of Telehack:
- Multi-user environment: You can interact with other users and explore simulated versions of historical BBSes and online platforms.
- Basic functionality: Use rudimentary commands like telnet, FTP, and BASIC to navigate the system and run applications.
- Historical context: Learn about the early days of the internet and how people communicated and interacted online before the explosion of modern tools and platforms.
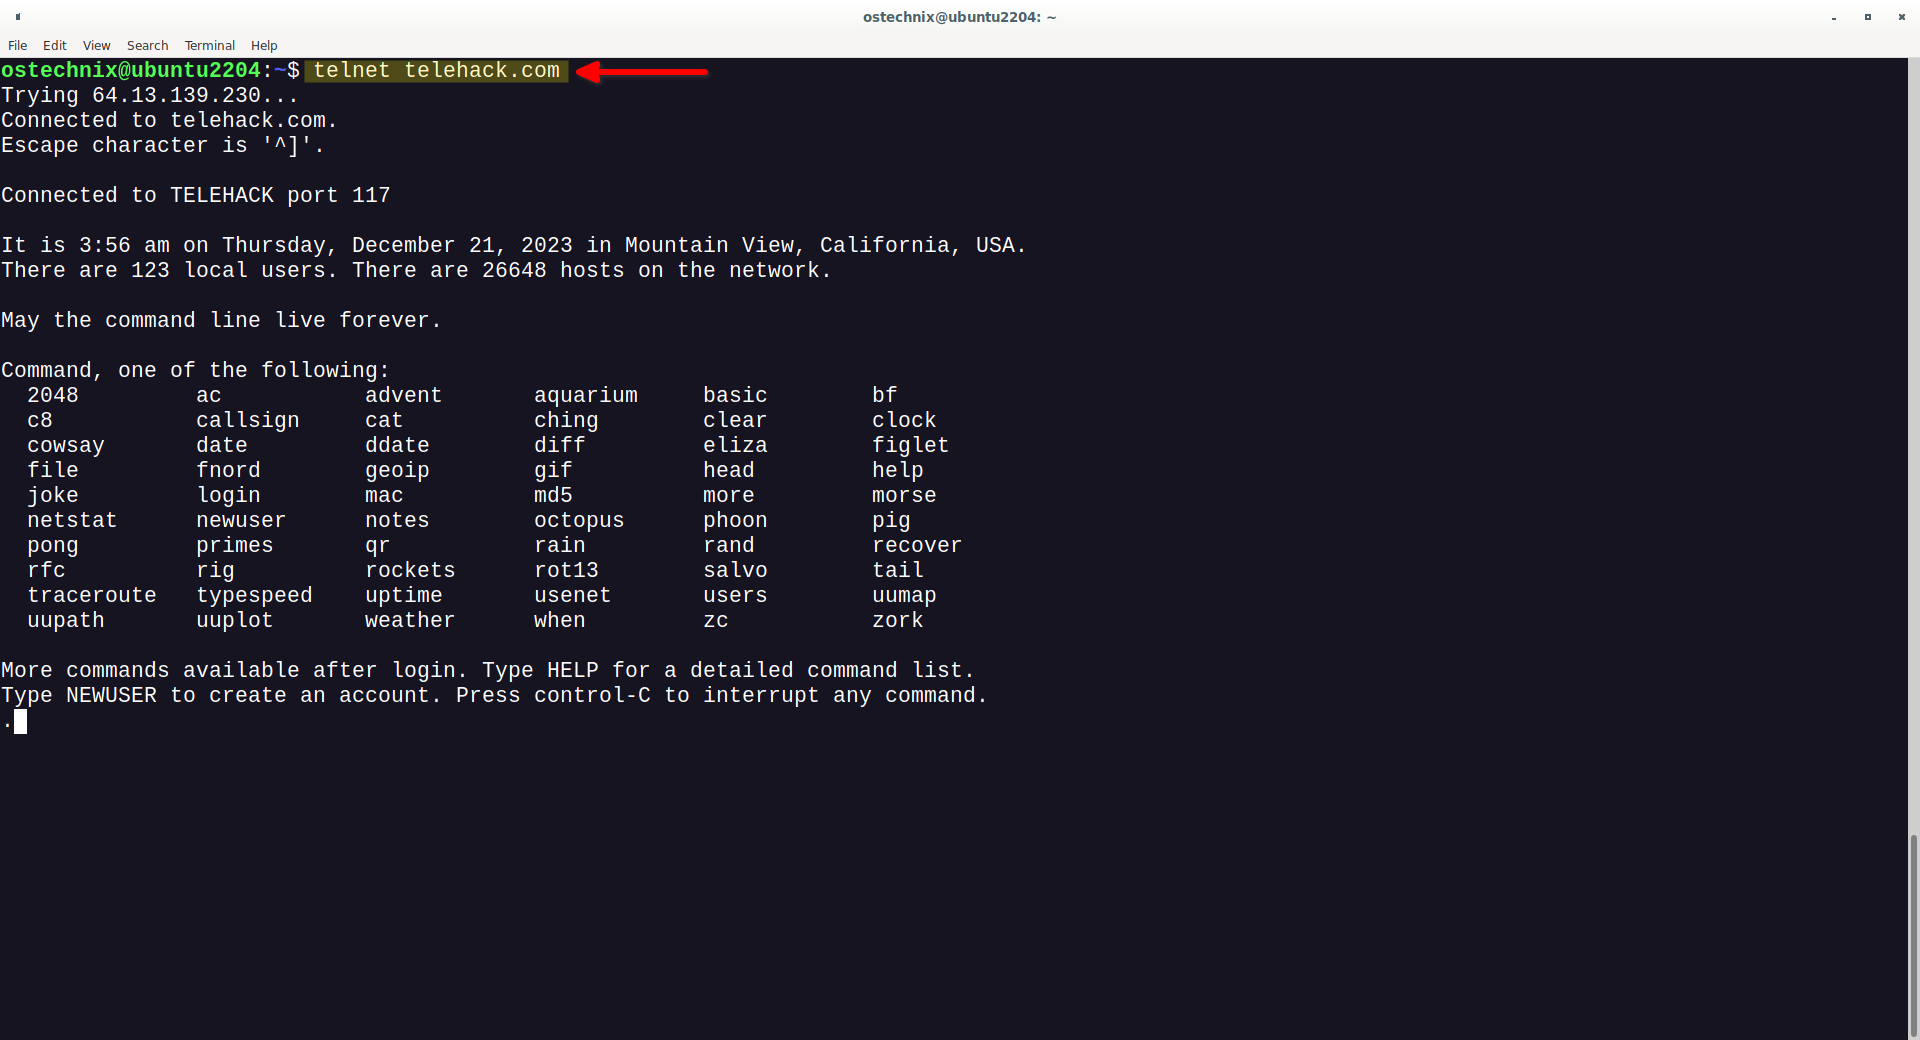
To access the telehack site, run the following command from your Terminal:
$ telnet telehack.com
You will be connected into a simulated environment similar to what existed before the modern internet.
Explore the given commands in the simulator.
For quick entertainment on Telehack, simply type 'STARWARS' to experience a full-length rendition of Star Wars in captivating ASCII art.
If you're in the mood for humor, try 'JOKE' to enjoy a randomly selected joke from a vast historical ARPAnet/Caltech joke database.
For a mesmerizing visual treat, type 'Aquarium' to watch an animated aquarium come to life in ASCII art.
Type HELP to view the detailed list of available commands. For more commands, you may need to login.
To quit, type exit and press ENTER.
27. Display Star Wars Episode
This is for Star Wars fans! You can read the entire Star Wars episode from your Linux terminal. All you have to do is just open the terminal and run the following command:
$ telnet towel.blinkenlights.nl
The command telnet towel.blinkenlights.nl is used to access a famous Easter egg in the telnet protocol. When executed, it connects to a server that plays an ASCII art animation of "Star Wars: Episode IV - A New Hope".
This unique representation of the film is entirely in text format and can be viewed in any standard terminal that supports telnet. It's a fun and creative use of ASCII art to recreate a popular movie in a way that's accessible via a simple terminal command.
Please note that this web service sometimes may not work all the time. I often encounter timeout issues while using it.
Conclusion
In this tutorial, we discussed various fun Linux command line tools with examples. This list is not exhaustive. I will keep looking for funny command line tools for Linux.
If I discover similar utilities in the future, I will add them to this list. Also, feel free to share your own findings via the comment section below.
Have fun!

